Hey Guys!
My hubby and I flew out to Las Vegas the day after Christmas for some much needed R&R.
We stayed in Henderson about 30 mins from the Vegas strip. We aren’t fans of the strip so we don’t stay there. We rented a condo through VRBO at the Montelago Resort. We loved this area! The condo was very nice and the grounds were beautiful!
While in Vegas, we explored a few places .. one of them being the Valley of Fire State Park. We had visited this park back in July 2013 and I can tell you, December temps are much more tolerable!
It was 108 degrees when we visited in July and only in the upper 50’s when we were there in Dec….so HUGE difference!
Tip: Red Rock Canyon is another place you can visit while in this area. It’s approx 30 mins from the Strip.
The Valley of Fire is located in the Mojave Desert and is approximately 60 miles from Las Vegas so it makes for a great day trip if you are visiting the Las Vegas area.
The park covers 35,000 acres and is Nevada’s oldest state park…it was dedicated in 1935. The park got it’s name from the red sandstone formations that are scattered throughout the park…they appear to be on fire when reflecting the sun’s rays.
The park is opened 7 days a week, 365 a days a year from sunrise to sunset and there’s an entrance fee of $10 per vehicle. There are 2 campgrounds located in the park with a combined total of 72 units…they are first come first serve. Camping is $20 per night.
We started our day early since the days are shorter in Dec. We made sure we had a full tank of gas, snacks and plenty of water. Even though it wasn’t that hot, you still want to make sure you stay well hydrated.
The drive took us around an hour but if you start out at the visitor’s center, it will take approximately 1 hr 5 mins from Henderson & 1 hr from the Las Vegas strip.
We didn’t stop at the visitor’s center since I had made notes of all the places we wanted to see and since we had already visited the park once before. We did, however, miss seeing several stops in the park during our last visit so I was more prepared this time.
Tip: Click here for the 16 best things to do in the park & click here for a map of the park
Tip: 1 hr 20 mins from Valley of Fire or 45 mins from Las Vegas is the popular Ringbolt hot springs hike. Read a detailed blog post about the hike here.
After entering the park, our first stop was having our picture made at the Valley of Fire state park sign! This is a must for us when visiting any state or national park! 🙂
We then continued our drive through the park….the scenery here is just unbelievable and that’s why it was on my must do list during our 2nd visit to Vegas!!
Our next stop was Elephant Rock…It’s not that impressive but it’s worth the stop.
We noticed the park had added this frame that you can stand behind that read Greetings from the Valley of Fire State Park…that along was worth the stop!
There was a short trail to the rock from the parking area but it was a bit confusing so to cut out the confusion, if you walk along the road, it’s a short distance and can be spotted from the road.

There was a second trail at this same location…we walked it a short distance and spotted this cool rock! There are so many unique rock formations in the park!

We continued our scenic drive through the park….I was taking tons of pictures while we were driving!

Our next stop was a memorial site for Sergeant John J Clark. We didn’t make a stop here the first time we visited so we decided to make a quick stop to see who the memorial was for..
Sergeant John Clark had emigrated to California after being discharged from the military & while traveling from Bakersfield to Salt Lake City on a buckboard, he stopped near this spot, tied his horse to the back of the wagon and wandered around, possibly looking for water.
Eventually, he crawled under his buckboard and died, presumably from thirst, several days before his body was found on June 30th, 1915.

After this short stop, we continued our drive to our next stop, while I continued taking hundreds of pics!!

We arrived to our next stop, the petrified logs. This was a very short walk and I really don’t recommend it if you are pressed for time. The logs are surrounded by a fence and it really didn’t look like much as you can see by my pictures.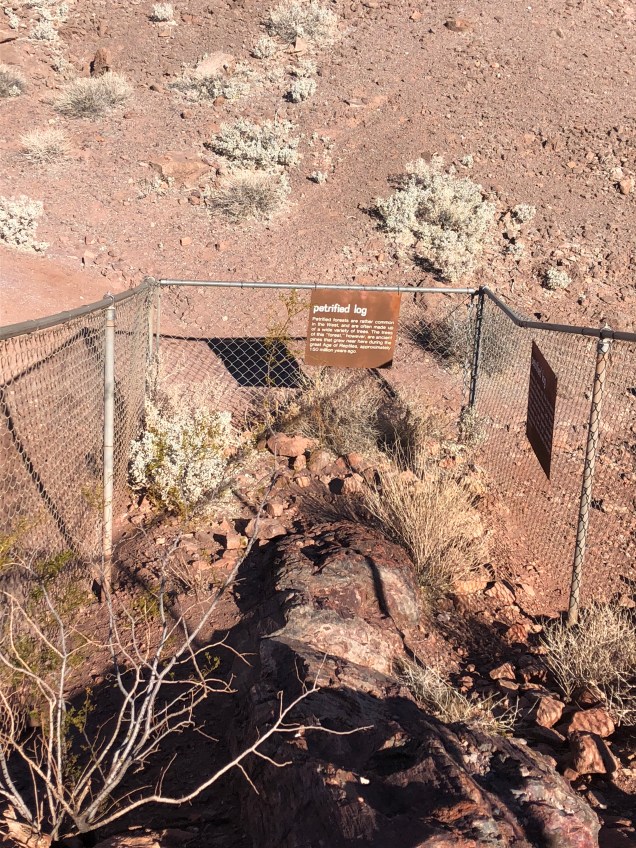

On to the next stop…. the Lone Rock. Lone Rock is a single large, red boulder in a parking lot. It basically provided shade for a nearby picnic table.
It wasn’t an impressive stop but we had to pass the rock to get to our next stop, The cabins. The cabins were built in 1933 by the Civilian Conservation Corps for travelers visiting the park.
The cabins were built of stone and they each had windows and a fireplace.
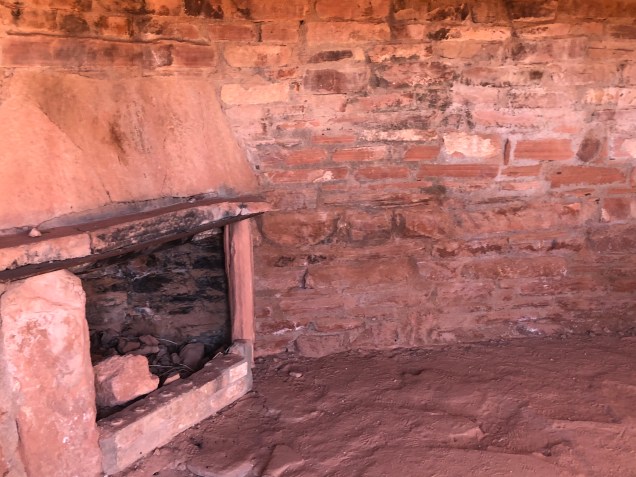

If you look closely you can spot petroglyphs near the cabins. There are petroglyphs all throughout the park.

After leaving this area, we headed to our next stop, the Seven Sisters.
The Seven Sisters is a group of 7 tall, red, eroded boulders surrounded by the sandy desert. Once part of the nearby red formations, these rock towers are all that remain after erosion stripped away the surrounding sandstone deposits. Numerous “blow holes” forecast the eventual destruction of the towers that will take place in the future.


This rock looked like a head!
After leaving here, we headed to our next stop while I continued my non stop photo shoot of the park!


After a short drive, we spotted some picnic tables across from the Mouse’s Tank parking area. So, we decided to stop and have lunch.
After lunch, we decided to skip the Mouse’s Tank hike and do it later since we would have to pass it again.
So, we headed to the next stop, which is a drive I HIGHLY recommend you do when in the park…the drive to the Rainbow Vista Trail.
It’s one of the most scenic drives in the park in my opinion…the road is lined with huge, red boulders! I took soooo many pictures during this short drive!
We then arrived to the Rainbow Vista Trail...it’s a short 3/4 mile trail and lives up to it’s name…it’s full of colorful rock!
Rainbow Vista is a viewpoint in the park, where the road reaches the top of a low ridge revealing a vast area of multicolored rocks stretching for many miles northwards. The panoramic view from Rainbow Vista is a great place for photos.
We followed the trail and came to a sign that said, Fire Canyon Overlook so we decided to check it out. The hike was about a mile round trip so make sure you have plenty of water with you…especially if you are hiking during the summer months.
The hike leads you through a small canyon and you will have to navigate your way through small boulders. It’s a pretty easy hike though.
The trail ends at a drop off and has views of the canyon valley…it was really beautiful!

After leaving here, we hiked back to Rainbow Vista…on the way, my hubby spotted this small arch where he attempted to climb under it for a picture….he wasn’t too successful!

We arrived back to the trail where we hiked up a huge rock to get panoramic views of the park….make sure you have good shoes on if you climb it…it’s full of loose rock and you can easily fall if you aren’t careful.
The views were definitely worth the climb!


After carefully walking back down, we walked around and spotted some beautiful rocks that were full of color…this is why it’s called Rainbow Vista!


We then headed to our next stop, the Fire Wave trail…not to be missed!
On the way to the trail, I took tons of pictures of the colorful valley! So beautiful!

During my research, I read there was a small pull off for this trail before you get to the parking area. I wasn’t sure where it was but we spotted a car parked on the side of the road and decided to park and see if this was the area.
The parking is only big enough for 2-3 vehicles. We started walking towards the rocks and sure enough, this was the spot. In this area, you walk through a narrow slot canyon before arriving to the “fire wave”.
Tip: Read more here & here about this trail
I would imagine that a lot of people miss the slot canyon if they park at the fire wave parking area.
The walk was beautiful and not to be missed!

This was definitely my favorite hike in the park! All the different colors in the rock are truly amazing!
We saw a few cacti on the trail
Just look at these views!


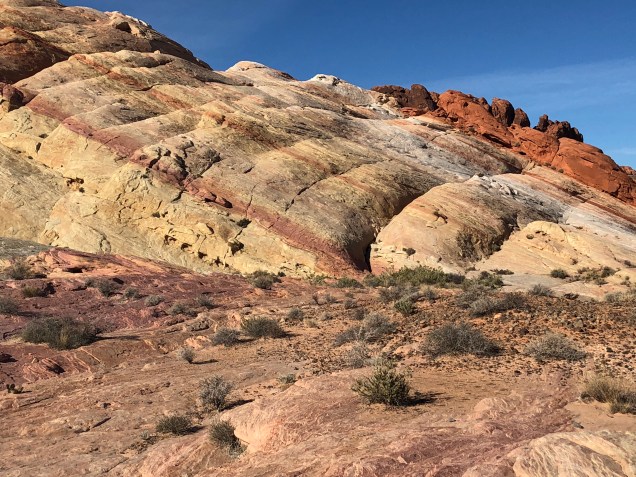

This was definitely one of the busiest stops of all the stops we did in the park.
The actual fire wave..


After leaving here, we headed to our next stop, the White Domes. It was sooooo crowded here!! This trail is very popular as well.
The area has picnic tables and restrooms.
The trail here is a 1.1 mile loop. The trail crosses stunning landscapes and passes beautiful sandstone formations with different shapes and colors.
We only walked to the “ruins” which are a 1/3 of a mile from the start of the hike. The ruins is simply a wall (made of stone with timbers and plaster) that was leftover from a 1965 movie production.
A sign explains that the fake ruins were used in the film, The Professionals, which also built a larger Mexican hacienda set at the site of the current White Domes Day Use Area.
Valley of Fire State Park has been a filming location for lots of movies like Transformers, Casino, Total Recall, Star Trek: Generations, and Austin Powers.
If you continue the trail past the ruins, you will approach a slot canyon. Shortly, after you enter the canyon, the walls quickly come together becoming a narrows where the walls are only a few feet apart.
Unfortunately, we turned around at the ruins so we missed the canyon.
Read here about 5 “can’t miss hikes” in the park
I can see why this is a popular area….it’s amazing!


After leaving here, we headed to our next stop., back to Mouse’s Tank trail...I continued my photo shoot along the way! 😉


Mouse’s Tank trail takes you to Petroglyph Canyon.….you will spot lots of petroglyphs along the canyon walls on this trail.
The trail is a short 0.8 mile round trip hike. This hike is definitely worth the stop!


We were amazed by all the petroglyphs!

After leaving here, we headed to our next stop, Atlatl Rock.
More pics along the way… 😉

Click here & here for the best photography spots in the park
Atlatl Rock is another great place to see petroglyphs up close. The petroglyphs are located on a boulder about 50 ft off the ground.
You have to climb a metal staircase that has been installed on the side of the boulder to be able to view them.
The boulder is very close to the parking area so there’s not a lot of hiking involved. However, the stairs are steep and there’s a lot of them! So be careful!


The petroglyphs were amazing!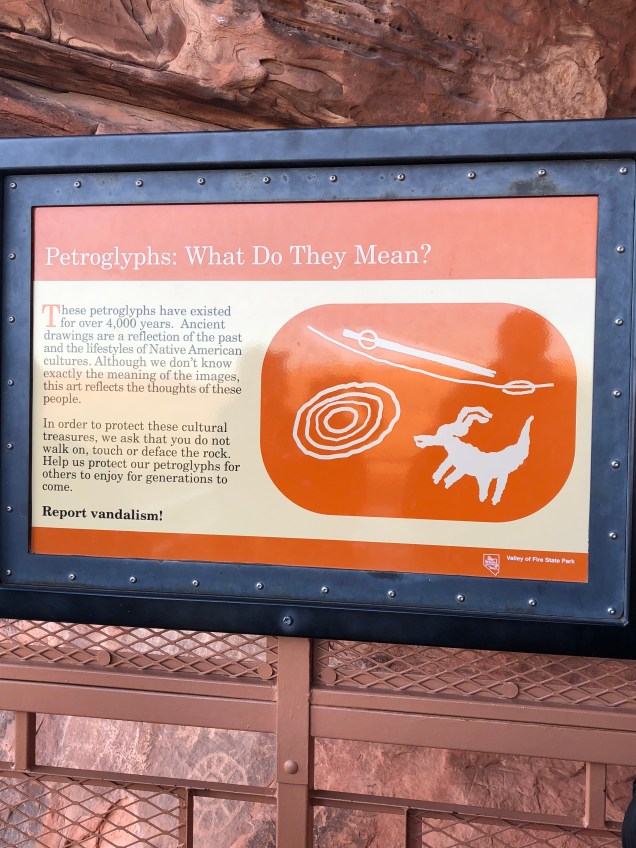


Next, we headed to our next stop which is a short drive from Atlatl Rock…it’s the Arch Rock.
Arch Rock is a must see and a great photo opportunity. There is also a 2-mile scenic loop that has views of some of the most interesting rock formations, including Arch Rock and Piano Rock.
The arch is right off the side of the road so it’s a quick stop unless you hike to Piano rock which is less than a miles hike.
You can’t walk up to the arch as it’s prohibited….

The surrounding scenery


Me and my shadow 😉
Click here to see how long the trails are in the park.
After leaving here, we decided to call it a day…we were tired and it was getting late…but as we were leaving, we saw several people parked on the side of the road…they had spotted several bighorn sheep!
So, of course, I made my hubby pull over so we could go see them ….annnnddd to take 237 pictures of them! 😉

As we were heading out of the park, we came across the Beehives so we made another quick stop to check them out. They can be seen from the road so no hiking required.
The Beehives are sandstone formations that look like a bee’s hive. They are really cool!

After this stop, we headed back to our condo….on the way, we spotted an In N Out...you can’t go out west and not eat here at least once….seriously, their burgers are SO good!

It was the perfect way to end a long day!
Thanks for reading and I hope this helps you plan your own trip to the Valley of Fire State Park!
Read Day 2 of our trip here, Day 3 here, Day 4 here and Day 5 here


 The largest


 Can you spot me in the pic below? 😉


 This area was one my favorites. The landscape was incredible.


