A Day at Valley of Fire State Park

Hey Guys!

My hubby and I flew out to Las Vegas the day after Christmas for some much needed R&R.

We stayed in Henderson about 30 mins from the Vegas strip. We aren’t fans of the strip so we don’t stay there. We rented a condo  through VRBO at the Montelago Resort. We loved this area! The condo was very nice and the grounds were beautiful!

While in Vegas, we explored a few places .. one of them being the Valley of Fire State Park. We had visited this park back in July 2013 and I can tell you, December temps are much more tolerable!

It was 108 degrees when we visited in July and only in the upper 50’s when we were there in Dec….so HUGE difference!

Tip: Red Rock Canyon is another place you can visit while in this area. It’s approx 30 mins from the Strip.

The Valley of Fire is located in the Mojave Desert and is approximately 60 miles from Las Vegas so it makes for a great day trip if you are visiting the Las Vegas area.

The park covers 35,000 acres and is Nevada’s oldest state park…it was dedicated in 1935. The park got it’s name from the red sandstone formations that are scattered throughout the park…they appear to be on fire when reflecting the sun’s rays.

The park is opened 7 days a week, 365 a days a year from sunrise to sunset and there’s an entrance fee of $10 per vehicle. There are 2 campgrounds located in the park with a combined total of 72 units…they are first come first serve. Camping is $20 per night.

We started our day early since the days are shorter in Dec. We made sure we had a full tank of gas, snacks and plenty of water. Even though it wasn’t that hot, you still want to make sure you stay well hydrated.

The drive took us around an hour but if you start out at the visitor’s center, it will take approximately 1 hr 5 mins from Henderson & 1 hr from the Las Vegas strip.

We didn’t stop at the visitor’s center since I had made notes of all the places we wanted to see and since we had already visited the park once before. We did, however, miss seeing several stops in the park during our last visit so I was more prepared this time.

Tip: Click here for the 16 best things to do in the park & click here for a map of the park

Tip: 1 hr 20 mins from Valley of Fire or 45 mins from Las Vegas is the popular Ringbolt hot springs hike. Read a detailed blog post about the hike here.

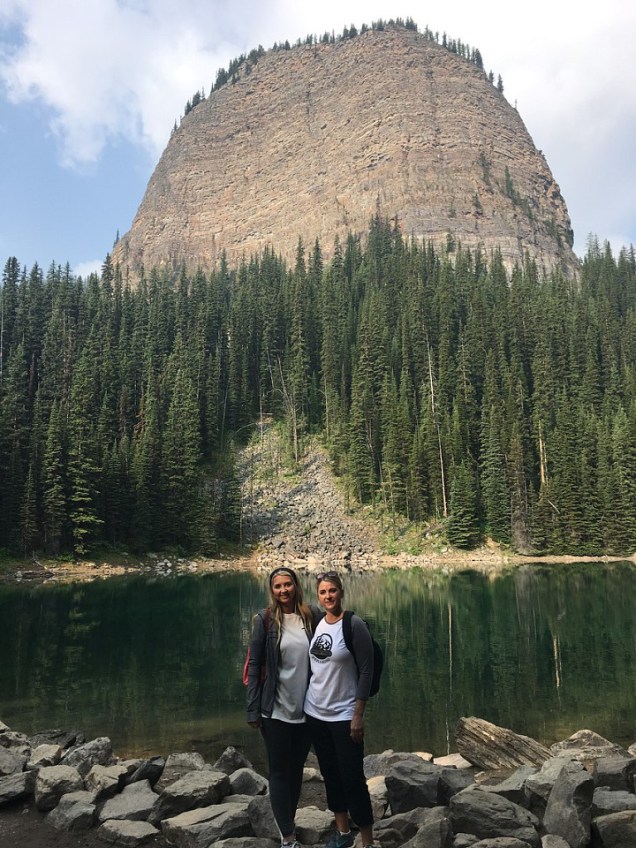
After entering the park, our first stop was having our picture made at the Valley of Fire state park sign! This is a must for us when visiting any state or national park! 🙂

We then continued our drive through the park….the scenery here is just unbelievable and that’s why it was on my must do list during our 2nd visit to Vegas!!

Our next stop was Elephant Rock…It’s not that impressive but it’s worth the stop.

We noticed the park had added this frame that you can stand behind that read Greetings from the Valley of Fire State Park…that along was worth the stop!

There was a short trail to the rock from the parking area but it was a bit confusing so to cut out the confusion, if you walk along the road, it’s a short distance and can be spotted from the road.

There was a second trail at this same location…we walked it a short distance and spotted this cool rock! There are so many unique rock formations in the park!

We continued our scenic drive through the park….I was taking tons of pictures while we were driving!

Our next stop was a memorial site for Sergeant John J Clark.  We didn’t make a stop here the first time we visited so we decided to make a quick stop to see who the memorial was for..

Sergeant John Clark had emigrated to California after being discharged from the military & while traveling from Bakersfield to Salt Lake City on a buckboard, he stopped near this spot, tied his horse to the back of the wagon and wandered around, possibly looking for water.

Eventually, he crawled under his buckboard and died, presumably from thirst, several days before his body was found on June 30th, 1915.

After this short stop, we continued our drive to our next stop, while I continued taking hundreds of pics!!

We arrived to our next stop, the petrified logs. This was a very short walk and I really don’t recommend it if you are pressed for time. The logs are surrounded by a fence and it really didn’t look like much as you can see by my pictures.

On to the next stop…. the Lone Rock. Lone Rock is a single large, red boulder in a parking lot. It basically provided shade for a nearby picnic table.

It wasn’t an impressive stop but we had to pass the rock to get to our next stop, The cabins. The cabins were built in 1933 by the Civilian Conservation Corps for travelers visiting the park.

The cabins were built of stone and they each had windows and a fireplace.

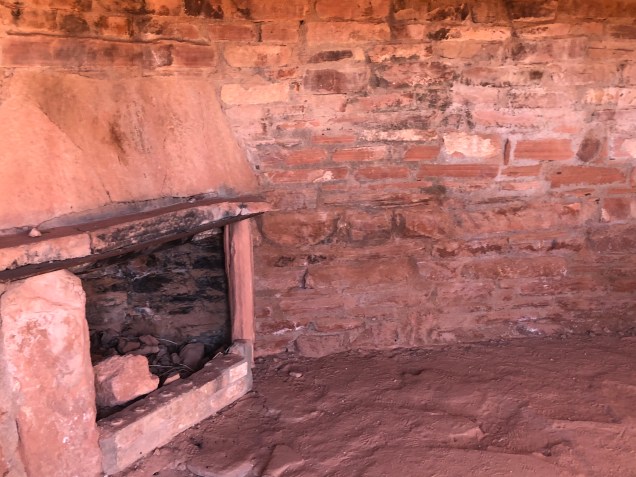
If you look closely you can spot petroglyphs near the cabins. There are petroglyphs all throughout the park.

After leaving this area, we headed to our next stop, the Seven Sisters.

The Seven Sisters is a group of 7 tall, red, eroded boulders surrounded by the sandy desert. Once part of the nearby red formations, these rock towers are all that remain after erosion stripped away the surrounding sandstone deposits. Numerous “blow holes” forecast the eventual destruction of the towers that will take place in the future.

This rock looked like a head!

After leaving here, we headed to our next stop while I continued my non stop photo shoot of the park!

After a short drive, we spotted some picnic tables across from the Mouse’s Tank parking area. So, we decided to stop and have lunch.

After lunch, we decided to skip the Mouse’s Tank hike and do it later since we would have to pass it again.

So, we headed to the next stop, which is a drive I HIGHLY recommend you do when in the park…the drive to the Rainbow Vista Trail.

It’s one of the most scenic drives in the park in my opinion…the road is lined with huge, red boulders! I took soooo many pictures during this short drive!

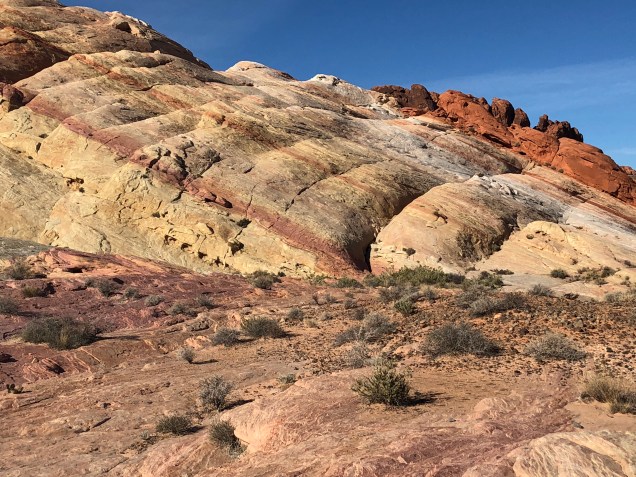
We then arrived to the Rainbow Vista Trail...it’s a short 3/4 mile trail and lives up to it’s name…it’s full of colorful rock!

Rainbow Vista is a viewpoint in the park, where the road reaches the top of a low ridge revealing a vast area of multicolored rocks stretching for many miles northwards. The panoramic view from Rainbow Vista is a great place for photos.

We followed the trail and came to a sign that said, Fire Canyon Overlook so we decided to check it out. The hike was about a mile round trip so make sure you have plenty of water with you…especially if you are hiking during the summer months.

The hike leads you through a small canyon and you will have to navigate your way through small boulders. It’s a pretty easy hike though.

The trail ends at a drop off and has views of the canyon valley…it was really beautiful!

After leaving here, we hiked back to Rainbow Vista…on the way, my hubby spotted this small arch where he attempted to climb under it for a picture….he wasn’t too successful!

We arrived back to the trail where we hiked up a huge rock to get panoramic views of the park….make sure you have good shoes on if you climb it…it’s full of loose rock and you can easily fall if you aren’t careful.

The views were definitely worth the climb!

After carefully walking back down, we walked around and spotted some beautiful rocks that were full of color…this is why it’s called Rainbow Vista!

We then headed to our next stop, the Fire Wave trail…not to be missed!

On the way to the trail, I took tons of pictures of the colorful valley! So beautiful!

During my research, I read there was a small pull off for this trail before you get to the parking area. I wasn’t sure where it was but we spotted a car parked on the side of the road and decided to park and see if this was the area.

The parking is only big enough for 2-3 vehicles. We started walking towards the rocks and sure enough, this was the spot. In this area, you walk through a narrow slot canyon before arriving to the “fire wave”.

Tip: Read more here & here about this trail

I would imagine that a lot of people miss the slot canyon if they park at the fire wave parking area.

The walk was beautiful and not to be missed!

This was definitely my favorite hike in the park! All the different colors in the rock are truly amazing!

We saw a few cacti on the trail

Just look at these views!

This was definitely one of the busiest stops of all the stops we did in the park.

The actual fire wave..

After leaving here, we headed to our next stop, the White Domes. It was sooooo crowded here!! This trail is very popular as well.

The area has picnic tables and restrooms.

The trail here is a 1.1 mile loop. The trail crosses stunning landscapes and passes beautiful sandstone formations with different shapes and colors.

We only walked to the “ruins” which are a 1/3 of a mile from the start of the hike. The ruins is simply a wall (made of stone with timbers and plaster) that was leftover from a 1965 movie production.

A sign explains that the fake ruins were used in the film, The Professionals, which also built a larger Mexican hacienda set at the site of the current White Domes Day Use Area.

Valley of Fire State Park has been a filming location for lots of movies like Transformers, Casino, Total Recall, Star Trek: Generations, and Austin Powers.

If you continue the trail past the ruins, you will approach a slot canyon. Shortly, after you enter the canyon, the walls quickly come together becoming a narrows where the walls are only a few feet apart.

Unfortunately, we turned around at the ruins so we missed the canyon.

Read here about 5 “can’t miss hikes” in the park

I can see why this is a popular area….it’s amazing!

After leaving here, we headed to our next stop., back to Mouse’s Tank trail...I continued my photo shoot along the way! 😉

Mouse’s Tank trail takes you to Petroglyph Canyon.….you will spot lots of petroglyphs along the canyon walls on this trail.

The trail is a short 0.8 mile round trip hike. This hike is definitely worth the stop!

We were amazed by all the petroglyphs!

After leaving here, we headed to our next stop, Atlatl Rock.

More pics along the way… 😉

Click here & here for the best photography spots in the park

Atlatl Rock is another great place to see petroglyphs up close. The petroglyphs are located on a boulder about 50 ft off the ground.

You have to climb a metal staircase that has been installed on the side of the boulder to be able to view them.

The boulder is very close to the parking area so there’s not a lot of hiking involved. However, the stairs are steep and there’s a lot of them! So be careful!

The petroglyphs were amazing!

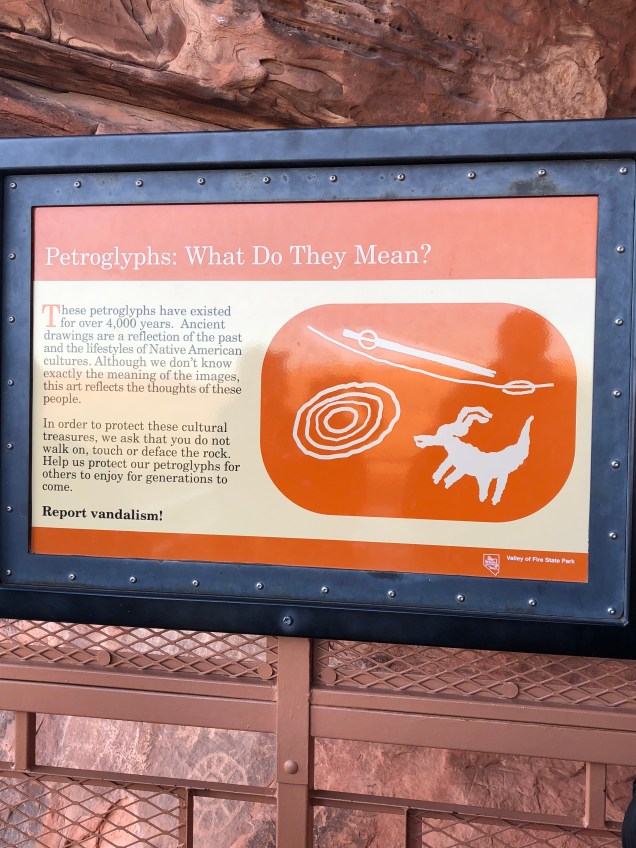
Next, we headed to our next stop which is a short drive from Atlatl Rock…it’s the Arch Rock.

Arch Rock is a must see and a great photo opportunity. There is also a 2-mile scenic loop that has views of some of the most interesting rock formations, including Arch Rock and Piano Rock.

The arch is right off the side of the road so it’s a quick stop unless you hike to Piano rock which is less than a miles hike.

You can’t walk up to the arch as it’s prohibited….

The surrounding scenery

Me and my shadow 😉

Click here to see how long the trails are in the park.

After leaving here, we decided to call it a day…we were tired and it was getting late…but as we were leaving, we saw several people parked on the side of the road…they had spotted several bighorn sheep!

So, of course, I made my hubby pull over so we could go see them ….annnnddd to take 237 pictures of them! 😉

As we were heading out of the park, we came across the Beehives so we made another quick stop to check them out. They can be seen from the road so no hiking required.

The Beehives are sandstone formations that look like a bee’s hive. They are really cool!

After this stop, we headed back to our condo….on the way, we spotted an In N Out...you can’t go out west and not eat here at least once….seriously, their burgers are SO good!

It was the perfect way to end a long day!

Thanks for reading and I hope this helps you plan your own trip to the Valley of Fire State Park!

Read Day 2 of our trip here, Day 3 here, Day 4 here and Day 5 here


Banff & Yoho National Parks

Hey Guys!

Due to this trip being 8 days I’ve decided to do 2 separate posts. One for Banff and Yoho and then one for the Icefields Parkway and Jasper. We did 4 full days at Banff & Yoho. We visited in July 2017.

Update: Read my post on Jasper & the Icefields Parkway here & Click here to see links to all of my blog posts

In my 2nd post, I will also include a day by day itinerary that may help you plan your own trip. I spent countless hours researching, planning and mapping out locations. Try downloading the app, Maps.me. We used it in Aruba and it was a lifesaver!

We flew into Calgary and rented a car from Enterprise. The cost was around $480 for a full size car through Expedia.

Tip – check both the online travel sites and the car rental agency’s site to compare prices. We drove from Calgary to Banff  which takes approximately 1 hr.

It was late when we arrived so we went straight to our hotel, Irwin’s Mountain Inn. We only stayed here the one night as we moved around often to be able to see and do as much as possible.

Read reviews here

Sunday was our first full day in Banff. We woke up and headed to Melissa’s Missteak for breakfast. This place is so good! We ate here 2-3 times.enhanceenhance

Read reviews here

The first day in Banff we visited the following locations: Bow Falls  (you can park and walk a path along the Bow River or you can park at the falls) & the Banff Gondola ($62 pp adult or $56 if booked in advance – $31 or $28 for children – check site for free rates for children).

Let me just say, the gondola was extremely crowded so I highly recommend you get here early and check the weather before you go. If it’s cloudy, you won’t see much. We didn’t buy our tickets in advance so we stood in a very long line.

They have food and drinks inside and at the top. The gondola ride takes 8 mins to the top and it can be a bit scary if you are afraid of heights. You also have a certain amount of time to spend at the top (1 1/2 -2 hrs if I can remember correctly).

If you want to leave before your designated time you have to go to customer service (at the top) and see if you can get your time changed. That’s what we ended up doing.

IMG_0036IMG_0083IMG_0187

The views from the top are truly spectacular!

We also did the Tunnel Mountain  drive. This is a about a 5 mi scenic drive and starts at the intersection of Banff Ave & Buffalo St.

On this drive you will see, Surprise Corner (a view of the Banff Springs Hotel), Hoodoos (unique rock formations-we never found them), Bow River, Mt Rundle and the Bow Valley. You will end up back on Banff Ave.

enhance

We then drove the Lake Minnewanka Loop. This is a 15 mi scenic drive. It’s about 10 miles from Banff. Your first stop along the drive will be Cascade Ponds. There’s a short .3 mile trail that leads to Cascade Falls.

IMG_0275

You will then see Johnson Lake , Two Jack LakeLake Minnewanka and Upper and Lower Bankhead. There are scenic boat tours, kayaking and canoeing available on Lake Minnewanka. There is also a cafe here.

enhanceIMG_0311IMG_0342

The loop ends back in Banff. I would allow approximately 1.5+ hrs for drive w/stops.

Tip: Click here for 21 things to do in Banff

We then headed to Eddie Burger for a delicious burger and our first ever poutine fries. They were delicious!

Read reviews here

After we ate, we headed to our next hotel, Castle Mountain Chalets.

Read reviews here

We stayed here 4 nights. The chalets were about 30 mins from Banff, 20 mins to Lake Louise, 10 mins to Johnston Canyon, 40 mins to Lake Moraine and about 5 mins from the Bow Valley Parkway.

enhance

We absolutely loved this place. It was so quiet! You have an amazing view of Castle Mountain. The property has a small general store that sells all kinds of snacks.

They also offer bike rentals, maps, discount Lake Louise ski lift passes and Lake Louise Gondola discounts. They also sell gas.

The general store hours vary seasonally so check their website for store hours.

The Bow River was a short walk from our cabin. There’s also a small parking lot at the bridge. We drove down a couple of nights to watch the sunset.

We also saw a bear in this area. The closest restaurants are at Baker Creek and Johnston Canyon Resort.

enhance

enhance

The next day we headed to Sunshine Village to do some hiking.

This place is known for their ski resort and their spectacular hiking trails. It was approx. 30 mins from our cabin.

We arrived and it felt like a ghost town…hardly anyone was here! It was wonderful!

We purchased the gondola and chairlift tour. The cost was $64 pp.

You ride the gondola for approx 25 mins and then get on the ski lift for about 10 mins. It was a little scary but the views were amazing! I HIGHLY recommend hiking here!

IMG_0505

Picture taken from the standish viewing deck. You can see all 3 lakes from this viewpoint.

IMG_0569

There are several trails here but we only hiked to Rock Isle Lake (seen in the pic above). It’s about a mile one way and considered to be a moderate hike. There are trail maps available when you buy your tickets.

We were here in July and the flowers were blooming all over!! Also, this is bear habitat so wear bells or make noise..becoming bear poop is not how you want your vacation to end! 😉

We ended up eating lunch at one of the cafes. Not many choices available…we ate a pre made sandwich and chips.

We then headed to the Bow Valley Parkway. This is a 32 mile scenic drive and our cabin was only a mile from this parkway. This drive offers one of the best wildlife opportunities in Banff …however, we never saw anything.

enhance

There are several stops along this drive as well as hiking trails. However, there was only a few places worth stopping in my opinion and my favorite was the beautiful Johnston Canyon.

There are 3 hikes at this location…. The upper and lower falls and the ink pots. This place has bathrooms as well as food. If you are pressed for time, I would pick this one stop over the others.

Tip: Read here for a complete guide of this area and recent closures

Unfortunately, we only did the lower falls because it started raining and it was SO crowded on the trail that you could barely move! Get here early if you can.

enhance

enhance

We only did 4 stops on this drive.

One of the other stops we did was Morant’s Curve.

There were no signs for this stop.

It has panoramic views of the river, rail line and the Canadian Alps. A lot of people will stop here in hopes to capture a train on the tracks. Below are some shots I took at this location.

enhanceenhance

Another stop was at Hillsdale Meadows: A short hike to an open meadow. There were 2 red chairs sitting against the aspen trees that made for a pretty shot.

The other stop we did was Backswamp. This place is a marshy wetland where the Bow River once flowed. You can sometimes spot big horn sheep here as well as Ospreys and Blue Heron.

enhance

After we finished this drive, we headed back into Banff to find something to eat.

The food is expensive and the service was sub par at most of the restaurants we went to.

After eating, we walked/drove around Banff. Don’t miss taking your picture at the Banff sign.

IMG_0368

We then did the Vermillion Lake Drive. The drive is less than 5 mins from the Banff sign.

It’s a really peaceful place and we loved it here. It’s only a 2.5 mi drive and there is a walking trail you can do at the very end.

This is also a good place to spot wildlife. We saw a black bear while we were here.

It’s also a great place to watch a sunset or have a picnic. The views of Mt Rundle are awesome!

Don’t miss this short but scenic drive!

IMG_0369

enhanceenhance

We then headed to one of the must do places….Lake Louise !! This place is not to be missed! The lake usually thaws sometime in June..we were there in July.

You can hike along the shoreline or hike up to the famous Lake Agnes Tea House. We did this hike on a different day and I’ll write about it later in this post.

Click here for the 8 best hikes in this area

Lake Louise is a year-round destination outside of the shoulder months of October/May, and even then, certain points in those months can be great. In the winter, you can enjoy sleigh rides, ice skating, ice climbing, skiing, and snowshoeing.

The best tip that I can give you is to get here either very early (6-8 am) or much later in the evening (7-8 pm) to avoid the crowds. They do have an overflow parking lot where you park and are shuttled by bus to the lake. We parked at the lake both times we went.

Update: Paid parking will be in effect for Lake Louise from 7am-7pm between mid-May and mid-October. This is in addition to your Parks Canada Pass needed for all of Banff National Park.  Look for pay stations when you arrive at Lake Louise; the fee is $12.25 per vehicle per day. You’ll need to input your license plate number into the pay kiosk. You cannot park overnight at Lake Louise lake shore.

Also new is the need for a reservation if you intend to ride the summer shuttle to Lake Louise from the Lake Louise Park and Ride. Reservations open on May 4th, 2022 at 8am MST, on the Parks Canada website. This option guarantees you will get to Lake Louise, while the paid parking is on a first-come/first-serve basis

Once at the Lake Louise Lakeshore, you can connect between Lake Louise and Moraine Lake on a first-come, first-serve basis via the Lake Connector shuttle (free with shuttle reservation); they run every 15 minutes.

There will also be a portion of seats released on a rolling basis for the Lake Louise shuttle, 48 hours prior to departure day at 8 am MST. Walk up seat sales are possible if there is space on the shuttle. You’ll be able to book your seat reservation on the Parks Canada website.

After arriving to the lake, we rented a canoe at the boathouse. The cost was $105 for an hour. The beautiful, historic Fairmont hotel is located right on the shoreline. The cost to stay here in July is around $700-900 a night. (Update: The cost is now $135 for an hr and $125 for 30 mins)

We purchased our lunch at the 24 hr deli inside the hotel and it was very good. There is also a gondola ride you can do for around $30 pp. It’s a 14 min one way ride.

enhanceenhanceenhance

enhance

The next day we decided to spend at the beautiful And not to be missed, Lake Moraine! This lake is even more spectacular than Lake Louise!

Again, get here early or late evening to avoid the crowds. There isn’t an overflow parking lot for this lake unlike Lake Louise and parking can fill up quickly! I wouldn’t get here later than 8-8:30 am.

Update: There is now a shuttle for Lake Moraine that leaves from the Lake Louise overflow parking lot & the Banff train station.

Update for 2023: In 2023, Moraine Lake Parking will be officially closed to personal vehicles. This new policy will help alleviate some safety, preservation, and congestion concerns around the Moraine Lake site. Read more here and book your shuttle ticket here.

Visitors can now visit the lake through the public shuttle bus system known as Park & Ride. It is also possible to access the lake via bike, public transport from Banff, or a private tour company. Disabled visitors can still access the Moraine Lake parking lot.

You can rent canoes here and the cost is around $100 an hr (not per person) unless you stay at the Moraine Lake Lodge, then it’s free. There are plenty of things to do here to keep you busy for several hours. (Update: The cost is now $130 an hr)

There are several hiking trails as well as horseback riding and a gondola you can ride.

For more activities in this area click here

Be mindful, if you are planning a visit here, the lake does not begin to thaw until June and you can’t access the lake during the months of Nov – April due to high avalanche risk. Also, during the times of high grizzly bear activity, there are many hiking trail restrictions.

After arriving, we did a small portion of the shoreline hike and the Rockpile hike.

The views were stunning!! Don’t miss the “20 dollar” view as it’s called from atop of the Rockpile. They call it this because it’s actually on the back of their older 20 dollar bills. It’s a very short hike and so worth it!

enhanceenhance

The Rockpile Trail (above)

enhance

That “20 Dollar” View!! I personally think it’s a million dollar view! enhance

The color of the water changes depending on where you are viewing it from!

After Lake Moraine, we headed back to Lake Louise. We actually visited both lakes twice. We visited in the evening and during the day and let me just say, during the day it’s a mad house! Since Lake Louise has overflow parking, you may want to go to Lake Moraine first.

After reading about the hike to the Lake Agnes Tea House during my trip planning,  I really wanted to add this hike to our list. It’s a 4.5 mi round trip hike. I thought I was in half way decent shape until I took on this hike! It was brutal…to me anyways.

I mean, there was an 80 yr old man that passed me but whatever! It was uphill and I could hardly breathe due to the elevation gain! Be prepared and take plenty of water and snacks.

There is food at the tea house so maybe that will motivate you enough to keep going! They also serve more than a 100 different types of loose leaf teas!

Read reviews for the hike here

Sadly, it was so busy when we arrived, we decided to pass on eating lunch here… I did hear the food was really good.

On this hike you will see some spectacular views and even though, at times, I felt I needed to be airlifted out of there, in the end, I was SO happy that I endured the pain and blisters for the views I saw! Make sure you have very comfortable shoes for this hike!

You will not only see Lake Agnes and the tea house you will also see Mirror Lake & Beehive. The hike continues past the first tea house. If you continue, you will come to a 2nd tea house which was built in 1924.

The first one was built in 1901 but was replaced in the early 80’s. However, there were some tables, chairs and windows from the original tea house used in the building of the newer tea house in order to preserve the authenticity and rustic charm.

This trail also leads to the Plain of Six Glaciers and the Plain of Six Glaciers Tea House.

We turned around after arriving to the first tea house.

enhance

Views of Lake Louise from the trail…if you look closely, you can see canoes!

enhance

Mirror Lake and Beehive

Read here about the hike to Big Beehive

enhance

Small waterfall on the trail

enhance

Beautiful Lake Agnes!

enhance

The very crowded tea house

enhance

We hiked a short distance around Lake Agnes...

enhance

The flowers were in full bloom!!

We then headed back down…much better!

This is actually the day we canoed Lake Louise and had lunch at the 24 hr deli inside the Fairmont hotel.

On day 4, we planned to spend all day at YOHO National Park.

It was a 45 min drive from our hotel.

Yoho is located in Field, BC. I would highly recommend you add this park to your list of must dos!

There are several things to see/do at this park.

Your first stop will be the Spiral Tunnels. The Spiral tunnels are railways that have been carved through mountains. If you time it right you will get to see a train coming through the tunnel.

enhance

There is a second spot where you can view the Upper Spiral Tunnels in Cathedral Mountain. Its a pull off located 2.3 kms along the Yoho Valley Rd.

The tunnels are now so obscured by trees you can barely see it. I had to zoom all the way out with my camera to find it.

The next stop will be Takakkaw Falls. It’s one of the highest waterfalls in Canada.enhanceenhance

You will then come to the Natural Bridge. The bridge is a limestone rock formation that has formed over the Kicking Horse River.enhance

enhance

Next will be the breathtaking Emerald Lake!

You can hike and canoe here. There is also food available as well as the beautiful Emerald Lake Lodge.

We hiked a short distance around the shoreline trail.

enhanceenhance

Read more here on things go do at Emerald Lake

After leaving the lake, we headed to the very small town of Field.

It was really cool and I highly recommend you make a stop here.

There are a few restaurants in Field and we ended up eating at Siding Cafe. We all ordered the chicken “burger”. It was truly one of the best I’ve ever had…my daughter and hubby agreed!

Read reviews hereenhanceenhanceenhanceenhance

After spending some time here walking around and admiring this quaint little town and all of the beautiful flowers that were blooming, we headed to the next stop which was Wapta Falls.

The falls are accessed by driving a 1.25 mile gravel road off the Trans-Canada Hwy. The trail is approx 3 miles roundtrip and is a fairly easy trail. I would allow approx 1.5-2 hrs for this stop.

I would recommend you wear bug spray as the trail is in a very forested area. I would also make noise in case of bears. The trail leads to the largest waterfall on Kicking River. It drops 30 meters and is 150 meters wide.

There’s a view looking at the river and the top of the falls however, if you go a bit further down (which is a bit harrowing), you can get to the viewpoints at the lower part of the falls for a different view.

enhanceenhanceenhance

These were the only stops we did in the park. There is also  Lake O’Hara.  However, access during the summer months are limited in order to protect the delicate environment. It can only be accessed by foot along a 7 mi gravel road or by reserving a seat on the Parks Canada bus.

These tickets start selling online April 20, 2018 at 8 am and are $14.70 r/t for adults and $7.30 for youth 6-16 yrs of age. Children 5 and under are free. Please keep in mind, these tickets book up for the entire season almost instantly! You can call Parks Canada at 1-877-RESERVE and make reservations over the phone as well.

There is also the Burgess Shale tour. This is the site of fossilized remains of over a hundred different marine animal species. This can only be accessed by a guided tour. You need to make advanced reservations as they limit the groups to 12-15 people.

We then headed back to Banff. We spotted an old bridge on the way back so we made a quick stop to check it out and take some pics.enhanceenhance

We spent the rest of our time in Banff walking around town shopping, eating and of course, taking lots of pictures! 😉

My hubby had read about these desserts called beaver tails so we just had to try them out! They were messy but so delicious!

enhance

Here are a few shots of Banff. We loved it here!

enhanceenhanceenhanceenhanceenhanceenhance

Me standing in front of the Bow River.  You can canoe here as well.

Other activities in Banff includeCave & Basin National Historic siteBanff Hot Springs, tour the historic Banff Springs Hotel that opened in 1888, do a boat tour on the Bow River, hike the Hoodoos Trail, do a hop on/off bus tour, visit the Cascade Gardens or canoe the Bow River for $40 for an hr. Rent a bike, visit the Banff Park Museum, do a Blue Bus Tour, do a river float on Bow River, take a sleigh ride, book a cowboy cookout or take a carriage ride. Visit the nearby town of Canmore.

There is also another national park only 30 mins from Banff or 10 mins from our cabin. It’s called Kootenay. I wished we had had time to visit…from what I read, there seems to be a lot to do and see there.

Tip: If you don’t want to stay in the town of Banff, another option is Canmore. It’s only 20 mins from Banff

Well, I hope you found this post to be helpful and informative and something you can refer to when planning your own trip to Banff or Yoho.  I’ll be working on my next post for the Icefield’s Parkway and Jasper and get that posted as soon as I can.

UPDATE: Read my Icefield’s Pkwy & Jasper blog here & Click here to see links to all of my blog posts

Thanks for reading!! 🙂