Tetons, Yellowstone & Bear Lake, ID

Hey Guys!

Lately, I’ve had A LOT of people asking me about Yellowstone.

I visited Yellowstone back in July 2015…before I started blogging about my trips. However, since I’ve had so many people asking me about it, I thought I would do a blog post on it.

Since I’ve had so many requests for Yellowstone, I thought I would go ahead and publish this post before my 2nd post on Asheville.

Click here to see links to all of my blog posts

So, let’s get started!

We flew into Salt Lake City, UT on July 17th (our trip dates were the 17th-24th). We picked up our rental car at Thrifty Car Rental and paid approximately $300 for a mid-full size car.

Tip: Closer airports would be the Jackson Hole airport and the airport at Bozeman

We then made the 4 hr drive to Jackson Hole, WY where we would be spending our first night.

Tip: I always book my car rentals through Travelocity or Expedia and never had any issues.

On the way to Jackson Hole, we stopped and snapped a pic in front of the Welcome signs for Utah & Wyoming…who else does this on their vacations? 🙂

We passed the Salt River Pass & Lander Cut …the elevation was 7,600 ft.

We passed through Afton, WY….I snapped a pic of this cool looking antler arch as we were driving through.

Click here for 12 things to do in Afton

After arriving to Jackson Hole, we checked into our cute little cabin at the Cowboy Village. The cost was $225 for 1 night.
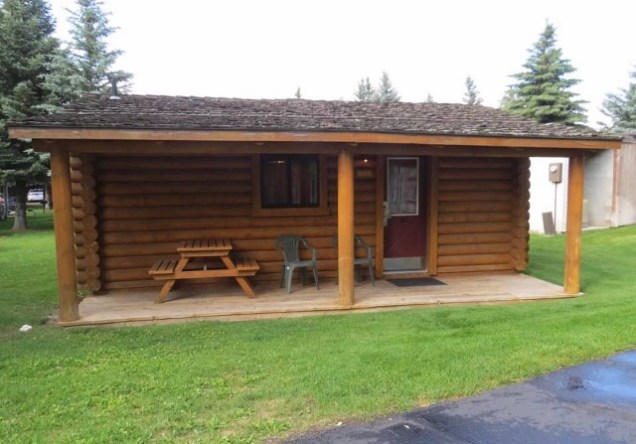
After getting settled into our room, we left to check out the small town of Jackson Hole.

Click here & here for the best things to see/do in Jackson Hole

We took pictures in front of the “famous” antler arch

Did a little shopping & finally had my pic made with a moose! 😉

We tried eating at the popular Cowboy Bar but it was way too crowded so we found somewhere else to eat!

After eating & walking around for a bit, we headed back to our room and called it a day!

Click here for the best restaurants in Jackson Hole & here for those on a budget

Our cabin was really cute & quaint but it was small…it had 1 bed, a pullout couch, 1 bath & a small kitchenette

Click here for the best hotels in Jackson Hole & here for budget friendly hotels

Tip: Don’t miss the National Elk Refuge when visiting Jackson Hole

DAY 2

The next day, we checked out of our room and headed into the Grand Teton National Park.

Click here for lots of free maps of the park & here for a map of just the Tetons

There are three visitor’s centers located in the park with Craig Discovery Visitor Center being the closest one to the entrance.

As usual, I took lots of pictures as we were driving!

However, the two pictures I missed taking, was a shot of the iconic Moulton Barn on Antelope Flats Rd and Mormon Row! The barn is perfectly framed by the mountains while bison roam freely nearby! :(.

The other being the Chapel of the Transfiguration. The small log chapel, built in 1925, offers spectacular views of the Teton Mountain Range.

If you add these two stops, you would add them after your stop at the National Park Sign.

Our first stop was 10 mins from our hotel – the entrance of the National Museum of Wildlife Art to snap a few pics of the art work of the various animals.

We chose not to visit the Museum which is home to more than 5000 works of art representing wild animals from around the world.

Buy tickets here – $15 for adults

We had our first real wildlife spotting here too….a marmot!

Our next stop was 5 mins from the museum – we stopped to have our pic made in front of the National Park sign….unfortunately, it was too foggy to see the mountains behind us.

As we continued our drive, I continued my photo shoot through the windshield!

Tip: You can either take the Teton Park Rd or Hwy 191 through the park…however, the Teton Park Rd is closed Nov-May. You can do the 42 mi scenic loop of the park if you have time. The Teton Park Rd is 20 miles long.

We pulled over several times to take pics of the scenery…

Tip: Click here for a map, along with stops, of the 42 mile scenic drive through the park

The wildflowers were blooming all over!

Next stop was a boat tour of Jenny Lake….the scenery here was jaw dropping!

We got off the boat on the other side of the lake and hiked a short distance to Hidden Falls waterfall.

Tip: There’s a hike you can do beyond the waterfall that takes you to Inspiration Point

Click here for 18 epic hikes in the Tetons

After our boat tour, we continued our drive through the park & made several stops along the way to take pictures.

We stopped off at a pullover that had some amazing views.

As we continued our drive we spotted this sign. There are black bears and grizzly bears in the park so always be on the lookout!

Our next stop, was Jenny Lake Loop Drive….the drive winds its way through the forest before opening up to a breathtaking view of Jenny Lake Viewpoint!

The one-way road is about 5 miles long. It is a well maintained, paved road that can be traveled in about 20 minutes, but this time doesn’t include stops to admire the scenery.

Once we arrived, we spotted a gentleman painting a pic of the gorgeous scenery..

The views are definitely a must see!

Tip: A flat 6.5 mi hike circumnavigates the lake…you can also hike to Hidden Falls & Inspiration Point from the other side of the lake as well as trails to String & Leigh Lakes that can be accessed from the northern shore of the lake.

Our next stop was another pull off with gorgeous views of the mountains…

We spotted another painter at this location

My daughter found a huge dandelion!

Our next stop was the Jackson Lake Dam & Reservoir.

Jackson Lake is a 400-foot deep natural lake with a dam added to it.

The dam was constructed in the early 1900s making it one of the tallest dams in the United States at that time. Unfortunately, the dam failed in 1910.

Our next stop was our hotel, the Jackson Lake Lodge that is located in the park…the lodge was VERY NICE and I HIGHLY RECOMMEND it…the stay for one night was $280.

After checking into our hotel, we headed to a popular stop to spot wildlife, Oxbow Bend

However, we never spotted anything! 🙁

During our visit, we did manage to see a bald eagle, multiple birds and a beaver!

Click here to read what animals are in the park and the best place to see them.

After leaving Oxbow Bend, we headed back to our hotel to eat at one of the restaurants called Pioneer Grill..it was a diner style restaurant… We all ordered the burgers …it was pretty good. The hotel offers 4 different restaurants.

The views from the hotel are incredible!

We then headed back to Oxbow Bend for one more chance at spotting wildlife…I really wanted to see a moose or a bear…but again, nothing!

We then headed to Cattleman’s Bridge and spotted some mule deer in a nearby field.
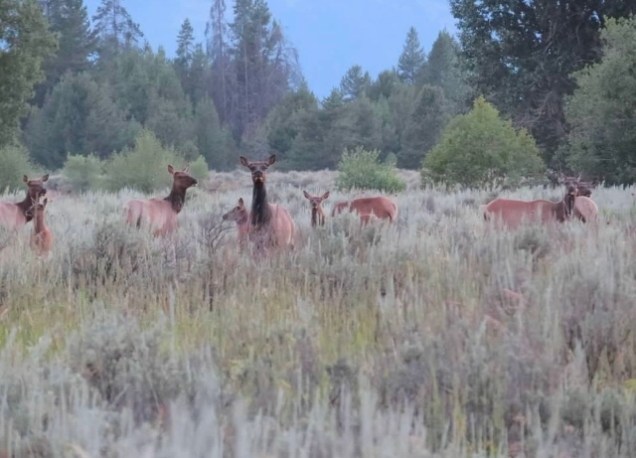
After this stop, we called it a night and headed back to our room.

Tip: Click here for 12 things not to miss in the Tetons, here for the 15 best things to do in the park,  here for the top 12 hikes in the park & here for itineraries for the park

DAY 3

To keep this from being a SUPER long blog post, I’ll try to leave out all of the boring details of our trip as most people just want the facts when needing an itinerary. So, let’s get started with our first day in Yellowstone.

Tip: Click here & here to read about the Grand Loop Drive

Click here for a very detailed map of the park

Tip: Yellowstone is a 40 min drive from the Grand Tetons and 1.5 hrs from Jackson Hole which is considered the South Entrance – Yellowstone has 5 entrances

The park has a $35 entrance fee and is only good for Yellowstone…it’s good for 7 days  – The Tetons has a separate $35 entrance fee …read here for a visitor’s guide to the park.

Tip: Purchase your entrance pass for Yellowstone here & click here to purchase for the Tetons – Read here about the free entrance days in the parks and read about the America the Beautiful pass here.

Our first stop, taking pics in front of the National Park sign.

Our next stop was only a 5 min drive from the entrance –this area is called the West Thumb Area where you will see the following: BLUEBELL POOL – HOT SPRINGS – FISHING CONEBLACK POOL KING GEYSERABYSS POOLPAINTED POOL – MIMULUS POOL – HOT BUBBLING MUD POTS & MORE

Click here for the 8 best geysers in the park & here for the current geyser activity.

We continued our drive and spotted Elk on the side of the road…

There are still signs of previous fires in the park

We made a stop at the Yellowstone River to take a few pics.

We walked down the boardwalk to the water’s edge

Our next stop is 40 mins from the West Thumb area called the Mud Volcano Area – this is where you will see – STEAM VENTS-(Warning: PUNGENT SULPHUR SMELLS) – 2/3 MILE TRAIL- MUD CALDRONDRAGONS MOUTH SPRINGBLACK DRAGON’S CALDRONMUD GEYSER – We also saw bison and deer here

After leaving here, we continued our drive..on the way, we passed lots of Bison..

Our next stop was 20 mins from Mud Volcano, you will come to an area where you will see the following:

Uncle Tom’s Point, Grand Canyon of Yellowstone, Artist Point, Upper Falls, Brink of Upper & Lower Falls, Lower Falls, Grand View, Inspiration Point, South Rim Trail, The North Rim Trail from Cascade Falls to Brink of the Lower Falls Trail, & The NORTH and SOUTH RIM drive.

South Rim Drive begins 2.3 miles south of Canyon Junction and leads you to views of Upper Falls at Uncle Tom’s Point and of Lower Falls and the canyon at Artist Point.

North Rim Drive begins 1.2 miles south of Canyon Junction. This one-way road takes you to four accessible views of the canyon, each featuring a different aspect of the canyon’s power, color, and geology.

At Brink of Lower Falls, glimpse Lower Falls and Upper Falls from paved accessible trails at the top or descend the steep Brink Trail to witness the Lower Falls’ power.

View Lower Falls again from Lookout Point, and see it again from a distance at Inspiration Point.

Grand View offers spectacular views of the canyon and river.

The spur road to Brink of Upper Falls is 1.6 miles south of Canyon Junction on the Grand Loop Road. Follow the paved path to a dramatic vantage point for viewing the Yellowstone River as it plunges over Upper Falls.

5 mins from Uncle Tom’s Point stop is Artist Point – Artist Point is an overlook point on the edge of a cliff on the south rim of the Grand Canyon.

From one side of the lookout (easy, short walk) you see beautiful, colorful canyon walls and on the other side there is a wider part of the canyon and the Lower Falls
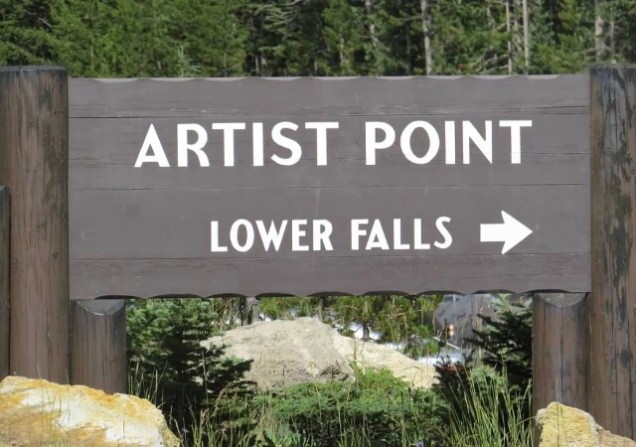
Lower Falls is the biggest & most famous waterfall in Yellowstone…it’s 308 ft tall and the 2nd most photographed spot in Yellowstone…Old Faithful is 1st.

Our next stop was 30 mins from Artist Point and is called the NORRIS GEYSER BASIN & MUSEUM – Sitting at the junction of three fault lines, the Norris Geyser Basin is the hottest, oldest and most dynamic of Yellowstone’s thermal area.

At this stop you will see: EMERALD SPRING & STEAMBOAT GEYSER (WORLDS TALLEST ACTIVE GEYSER).

The Norris basin consists of two areas: Porcelain Basin and the Black Basin.

Read here about deaths in Yellowstone and here about Bear inflicted fatalities.

After leaving this area, we checked into our hotel at Days Inn West Yellowstone where we would spend the next 2 nights…approx 14 miles (30 mins)from the Norris Geyser area taking the W Entrance Rd -(this road is closed Dec – April)…cost for 2 nights was $450-500…way overpriced for what you get!

Click here for the best hotels in West Yellowstone & here for budget friendly hotels

While driving to our hotel we saw a huge deer

After getting checked into to our room, we left and had dinner at the nearby Timberline Cafe

We ordered a burger, roast beef w/ gravy & mashed potatoes and a French dip sandwich…the food was pretty good.

Click here for the best restaurants in West Yellowstone & here for the best things to do in West Yellowstone

DAY 4

Our first stop of the day was approx. 1 hr from the West Entrance – Old Faithful
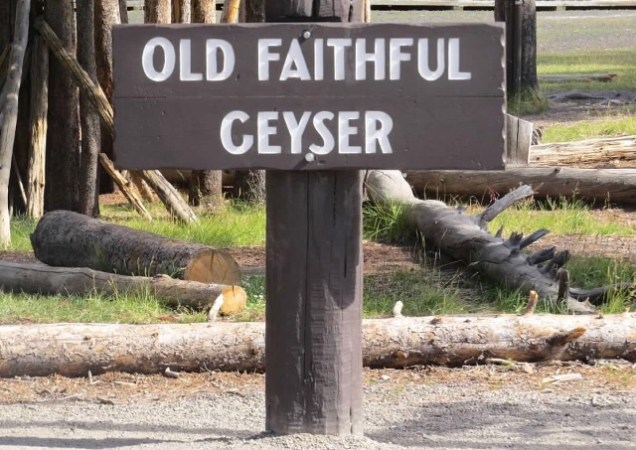
This is a VERY busy area!

There is lots to see/do here – the historic Old Faithful Inn & LodgeGift shops restaurants – and of course, we can’t forget Old Faithful Geyser.

There are also many trails to hike.

Old Faithful erupts every 35 to 120 minutes for 1 1/2 to 5 minutes. It erupts up to 20 times a day. Its maximum height ranges from 90 to 184 feet. It is not the biggest or the most regular geyser in Yellowstone but it is the biggest regular geyser.

We saw the nearby Chinese Spring

We checked out the Old Faithful Inn which was built in 1904 and has 65 ft ceilings. It’s the most requested accommodation in the park.

We then sat and waited for Old Faithful to erupt …it was extremely crowded!

But it was worth fighting the crowds to see this!

After watching Old Faithful erupt, we walked the nearby trails. I highly recommend you do the same as there is lots to see!

Click here for the hikes located in this area

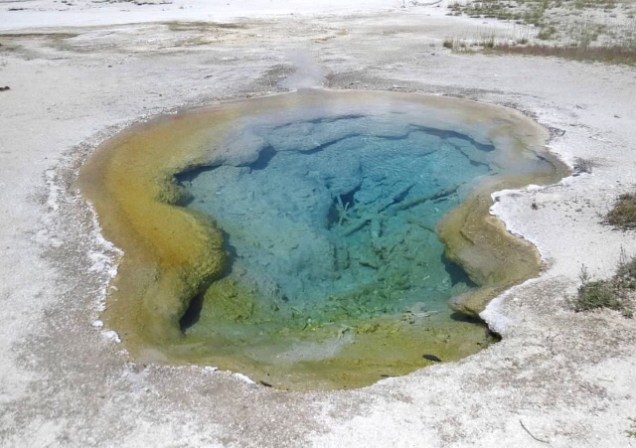
We saw: CASTLE GEYSERGROTTO GEYSER, GIANT GEYSER (HAD LAST ERUPTED IN JAN 2010) – SPA GEYSERSPITEFUL GEYSER & MORNING GLORY POOL (ONE OF MY FAVORITES!!)

We then headed back towards Old Faithful and saw it erupting again.

We stopped in at the General Store for some ice cream before heading to our next stop.

Click here for operating hours/days of all stores and visitors centers in the park.

The Old Faithful area is a place you could easily spend a day or a few hours…there is so much to see and do in this area.

Click here for tours offered, click here to book a room at Old Faithful Inn or any of the park’s lodging….these fill up quick! As much as a year in advance so book early!

After leaving this area we backtracked 7 mins towards the West Entrance to the BLACK SAND BASIN – (THIS AREA INCLUDES CLIFF GEYSER, RAINBOW POOL, SUNSET LAKE, EMERALD POOLCLIFF GEYSER

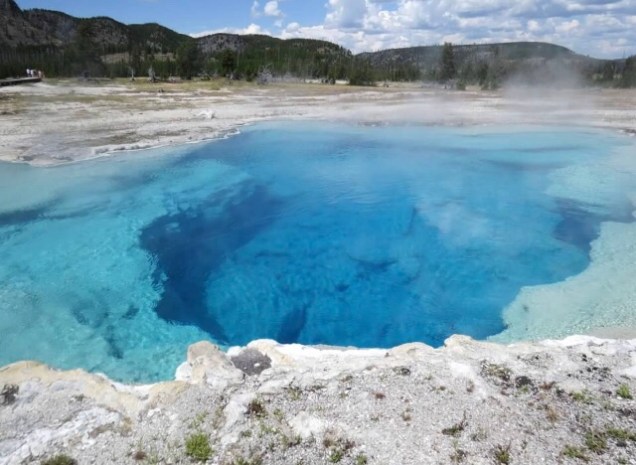
From here our next stop was a short 5 mins from the last stop called the BISCUIT BASIN AREA where you will see the BLACK OPAL SPRING – SO MANY COLORS HERE – SAPPHIRE POOL BLACK PEARL GEYSERMUSTARD SPRINGAVOCA SPRING

Our next stop was 7 mins from the last stop called the MIDWAY GEYSER BASIN – This area includes: TURQUOISE POOL, EXCELSIOR GEYSER, OPAL POOL & the famous GRAND PRISMATIC – Don’t miss the Fairy Falls hike.

Read here to find out the best spot to view the Grand Prismatic Spring

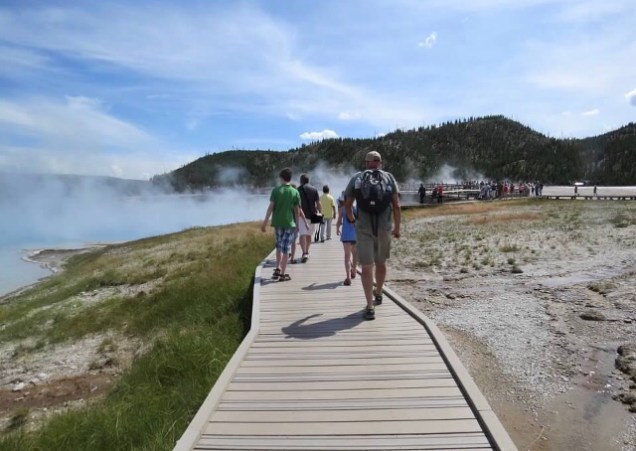
This is an AMAZING STOP and not to be missed! It’s crowded but most stops in Yellowstone are…there’s a boardwalk you can walk on like most of the other stops in the park.

Our next stop was 5 mins from last stop and it was the  WHITE DOME GEYSER AREASTEADY GEYSERYOUNG HOPEFUL GEYSER

From here we drove a short 6 mins from our last stop to the FOUNTAIN PAINT POTS – you can walk 30-45 min along the trail to see the following: FOUNTAIN PAINT POT, RED SPOUTER, LEATHER POOL, MORNING GEYSER, FOUNTAIN GEYSER, TWIG GEYSER, SPASM GEYSER, CLEPSYDRA GEYSER, CELESTINE POOL) Also saw very colorful BACTERIA MAT

Our next stop was 20 mins from the last stop – it was a small roadside waterfall called Firehole Falls – its forty-foot drop from a turnout and parking area on the Firehole Canyon Drive

Click here to read about 7 falls in Yellowstone

After this stop we headed back to our hotel…approximately 30 mins from last stop….on the way we saw Bison, swans & smoke billowing from hot springs and geysers

DAY 5

We started our morning with some pastries from the Woodside Bakery – (Update: this places is now closed)

Click here for the best breakfast restaurants in West Yellowstone

After we ate, we checked out of the Days Inn and headed towards the North Entrance where we would be spending our next night

As we were driving to our first stop, I took tons of pics…as usual!

We pulled over to to take pics of the Gallatin Range – this area is a critical habitat for grizzly bears and all Greater Yellowstone species, including mountain goat, mountain lion, mule deer, elk, bighorn sheep, and wolves and is a valuable corner of the Greater Yellowstone Ecosystem.

Speaking of Grizzly Bears, the north end of the range is home to Casey Anderson’s Montana Grizzly Encounter and Brutus the Grizzly, stars of many Nat Geo specials on Grizzlies and Yellowstone.

On our drive we had to watch out for bison ..they are all over Yellowstone.

We passed a roadside waterfall on the way. I’m pretty sure this is Undine Falls.

We drove through an area that had tons of limestone rock so we stopped and took a few pics.

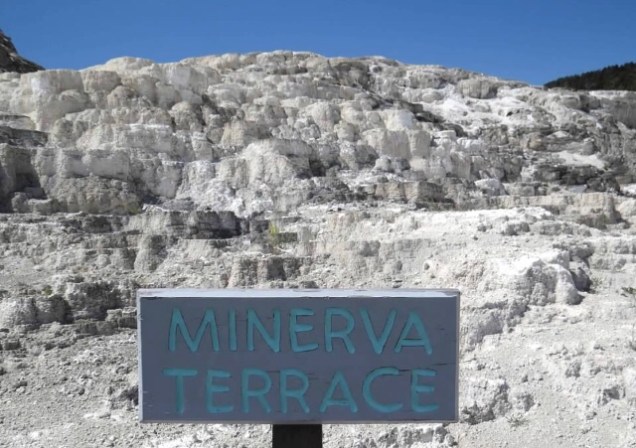
We continued our drive…the views along the way were amazing!! Our next stop was the Mammoth Springs Area – We stopped to check out an area that had the following: CLEOPATRA’S TERRACE, HYMEN TERRACE, LIBERTY CAP, PALETTE SPRING, OPAL TERRACE, MINERVA TERRACE, MOUND TERRACE, CANARY SPRING, – ORANGE SPRING MOUND

Next, we drove through the historic area of Mammoth Hot Springs…there are lots of Elk in this area.

We stopped in Gardiner and ate at the Cowboy’s Lodge & Grill

We ordered the Bbq Sandwich and fries…the service & food was average.

Click here for the best restaurants in Gardiner and click here for the best hotels

We then checked into our hotel, the Super 8 hotel….we paid $170 for one night.

The town of Gardiner is very old west style…we really enjoyed our time here.

Click here for the 20 best things to see/do in Gardiner

We took some quick shots of the Roosevelt Arch.

The arch was completed in 1903. It was the original gateway to Yellowstone. The North entrance is the only entrance that stays open year round.

After lunch & checking into our hotel, we headed out again …we spotted mountain goats as we were driving.

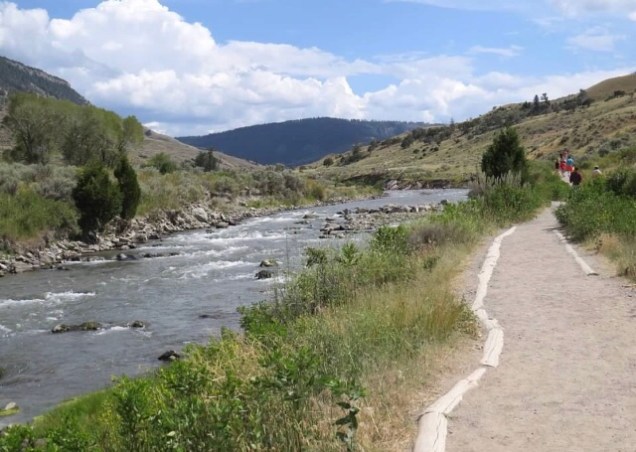
We made a stop at the Boiling River.

The Boiling River is sort of a natural hot tub where a large hot springs enters the cold waters of the Gardner mountain river. The cold and hot water mingle and makes the water temperature comfortable enough to bathe in.

We parked and walked the short trail (1.25 mi r/trip) to where you can swim and soak in the water.
We passed a sign on the trail showing we were halfway between the Equator and the North Pole.

We spotted a few bighorn sheep along the way…

Once we arrived to the entrance of the river, there were quite a few people soaking in the hot water.

We decided not to soak, so we just got in to snap a quick pic to prove that we at least got in.😉

After staying here for about 30 mins, we headed back towards Mammoth Springs.

We stopped and saw Liberty Cap, the many terraces and Devils Thumb.

After leaving here, we continued our drive….we stopped at Floating Island Lake to take a few pics.

After this stop, we headed to Soda Butte….on the way, we saw deer, bison & a bald eagle.

As we were driving, Bison started crossing the road blocking traffic.. we pulled over to take pics since there were so many with babies.

As we continued our drive we spotted a black bear with babies….we pulled over and they crossed the road right in front of us!!

We then passed the Gardiner Ranger Station & the Gallatin National Forest sign as well as the Welcome to Montana sign.

Shortly later, we arrived back to our hotel in Gardiner and called it a night.

DAY 6

We checked out of our hotel and headed to the nearby Roosevelt Arch to take a few more pics.

We then headed out to start our day….we passed one of the 4 Yellowstone National Park Post Offices.

We then passed the Mammoth Chapel that was built in 1913.

We also spotted more Elk.

As we continued our drive we stopped to photograph a nearby bridge.

After leaving here, we saw lots of people pulled over on the side of the road….Usually that only means one thing, they have spotted some kind of wildlife…so, we pulled over and sure enough it was a bear with her babies!!

Next we stopped at an overlook with some amazing views!

We then stopped at the Petrified Tree

Next we stopped at the Calcite Springs Overlook…the overlook is a short walk from a turnout on Grand Loop Road just north of Tower Fall.

At the overlook, we spotted a momma bear with her babies…

Our next stop was the Tower Fall Overlook …the fall plunges a stunning 132 feet.

The unusual rock columns north of the falls was created by lava flow that cracked as it cooled.

Next we stopped off at a pullover that had an information plaque talking about the presence of grizzly bears and how to increase your chances for spotting one….The sign went on to say that the area was prime grizzly country…..sadly we never saw one.

We then made a stop at the Mt Washburn/Dunraven Pass area.

Mt Washburn sits at an elevation of 10,243 ft and is a spectacular drive. The highway eventually reaches it’s highest point at at Dunraven Pass (8,839 ft). If you want to get even higher, you will need to hike the trail that takes you all the way to the summit of Mt Washburn.

Dunraven Pass is the highest road pass in Yellowstone and because of this, it can get snow any time of the year.

This area is a great place to spot grizzlies, bighorn sheep, and beautiful wildflowers!

You could still see the remnants of an old wild fire.

After this area we stopped off at the shores of Yellowstone Lake.

Yellowstone Lake is the largest lake in North America at this high an elevation, 7,733 feet. It is 20 miles long and 14 miles across from West Thumb to the opposite shore.

The lake covers 132 square miles and has a shoreline of 114 miles. It has an average depth of 139 feet, although the deepest point is 410 feet.

Our next stop was a small overlook of the lake with a sign talking about the temperature of the lake bed..

The hottest spot in the lake was found at Mary Bay where the temperature was recorded at 252°F. Hollow pipes, or chimneys of silica, several feet in height, were found rising up from the lake bottom at Mary Bay.

It is thought that these are the old plumbing systems of now dormant geysers. Rock spires up to 20-feet tall were found underwater near Bridge Bay.

Next we stopped at Steamboat Point

Tip: You can have a picnic lunch at the nearby Steamboat Point Picnic Area.

After leaving here we continued driving towards the East Entrance near Cody, WY..

We passed the East Entrance sign, the Shoshone National Forest sign (read reviews here) and a sign warning of Grizzly Bears.

As we exited out of the East entrance, we stopped at the Pahaska Tepee Grocery store for some snacks. There is also a gift shop, gas and lodging.

We also went into the gift shop for some souvenirs.

Tip: Cody, WY is an hour from this store

After leaving the store, we headed back into the park…

As we were driving, we spotted 2 deer on the side of the road

Next we stopped at Hayden Valley to see if we could spot any wildlife.

Hayden Valley is one of the best places in the park to spot wildlife…however, the only wildlife we spotted was chipmunks!

Tip: Be sure to bring your binoculars.

Next we stopped and spotted a Beaver in a pond….we also saw lots of Bison.

We then headed to our next hotel, the Grant Village Hotel inside the park. $215 for one night. The hotel was near the West Thumb area at the South Entrance.

DAY 7

We checked out of our hotel and made a stop at the nearby Yellowstone General Store.

We then exited the park at the South Entrance and headed back through the Tetons.

I took lots of pics on the way..

Since it was a clear day, We decided to stop back off at the Teton National Park sign and take another picture…this time you could see the majestic mountains in the background.

Next we headed back towards Jackson Hole on our way to Bear Lake, ID

We stopped off for lunch at MacPhails…a burger place that serves grass fed burgers..the burgers were delicious but expensive! $53 for 3 burgers, fries & drinks! Sadly, this place is now closed.

After lunch, we continued our drive to Bear Lake….Bear Lake is 3 hrs 40 mins from the South Entrance of Yellowstone.

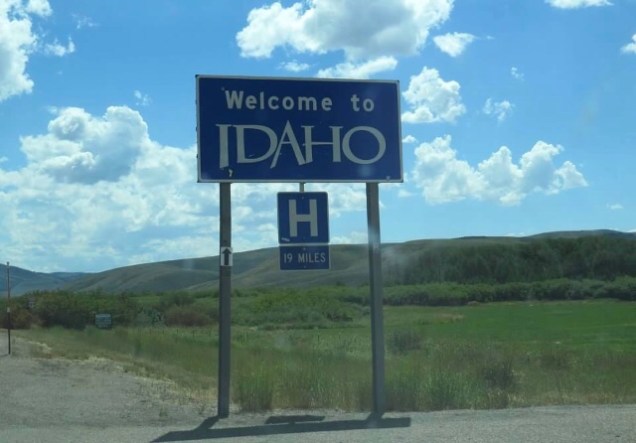
We passed the Welcome Sign for Idaho on the way
After 3 1/2 hrs of driving, we arrived in Montpelier, ID where we would be spending our next night.

Click here for things to do in Montpelier

We drove through the old historic town taking pics…we took pics of the Paris Tabernacle church.

Since its completion in 1889, it has functioned as a house of worship and a community center. Today it is also open for public tours.

Guided tours, about 30 minutes long, highlight the faith and sacrifice of early Church members who donated their time, labor, and money to build the tabernacle.

We stopped off to buy a “famous” raspberry shake…the area is known for their raspberries.

We also bought some fresh raspberries to add to our delicious shake!

Our next stop was the Bear Lake area…we snapped pics of the Oregon Trail Bear Lake Scenic Byway sign….

This scenic drive passes by beautiful Bear Lake, which straddles the Idaho-Utah border and continues through Oregon Trail country.

The lake is known for its turquoise-blue water, especially when viewed from Hwy. 89 summit (7,800 feet) high above Garden City, UT.

We then headed to Bear Lake …the lake is gorgeous!!

Bear Lake has been called the “Caribbean of the Rockies” for its unique turquoise-blue color, which is due to the reflection of calcium carbonate (limestone) deposits suspended in the lake.

Its water properties have led to the evolution of several unique species of fauna that occur only within the lake.

After spending about an hour at the lake, we headed back to Montpelier and took more pics of the small town.

There are lots of historic buildings in Montpelier. It’s also the location of the the famous Butch Cassidy bank heist.

There are lots of historical markers throughout the town….read the history of the town here.

I loved this old building…not sure if it was an old house or church.

Next we ate at one of the local restaurants ..I think there’s only 10 in the town…the population is around 2,000.

Click here to see the best restaurants in Montpelier

After we ate we checked into our hotel, the Super 8….the cost was $115 for one night.

DAY 8

We checked out of our hotel and headed back to Salt Lake City to fly home…the drive was approx. 2 hrs 45 mins.

After arriving to Salt Lake, we had a couple of hours before having to be at the airport so we drove around the city for a while.

Salt Lake is a beautiful place & I recommend you check it out if you have time.

Click here for 101 things to do in Salt Lake City

We stopped and checked out the Temple Square.

Temple Square is among Salt Lake City’s top attractions. It is the global headquarters of The Church of Jesus Christ of Latter-day Saints (popularly known as Mormons). The 35-acre area contains more than 15 attractions related to Mormon heritage and beliefs.

After spending a couple of hours here, we then headed to the airport.

Thanks for reading!

Click here to see links to all of my blog posts

HELPFUL TIPS

IF you only have 1 day to visit the park & are coming from Jackson Hole, I would suggest you enter the park from the south entrance (this takes you through the Tetons), It will take you approx. 1.5 hrs from Jackson Hole. You will then come to the West Thumb area (stop here), then head to Old Faithful (30 mins from West Thumb), then head to Black Sand Basin (7 mins), then Biscuit Basin (5 mins – Don’t miss Morning Glory Pool), then head to Midway Geyser Basin (6 mins – where Grand Prismatic is located), then Great Fountain Geyser (10 mins), then Fountain Paint Pots (6 mins), then Firehole Lake Drive (6 mins – 2-mile drive that passes geysers, hot lakes, hot springs-even a hot cascade.), then Fountain Flat Drive (11 mins – a 4 mi one way paved road), then Firehole Canyon Dr (20 mins – a 2 mi one way road). Head back to Jackson Hole …it will take you 2.5 hrs to get back.

If you do the Grand Loop, it will take approx. 4-8 hrs.

Click here for a fantastic map on how to tackle Yellowstone in 1-3 days!

Click here for best hiking in the Tetons

Here for best hiking in Yellowstone

Here for camping sites in Tetons & here for camping in Yellowstone

Here for biking in the Tetons & here for Yellowstone

Here & here for tours in the Tetons & here for Yellowstone

Here for 2 day itinerary of the Tetons & here & here for 4 day itinerary of Yellowstone

Here for restaurants in the Tetons & Here for restaurants in Yellowstone

Here for best app to guide you through the Tetons & here for the best app for Yellowstone – I HIGHLY recommend these!!

Here for gas in the Tetons & here for gas in Yellowstone

Here for best places for photography in the Tetons & here & here for Yellowstone

Here for best places to view animals in the Tetons & here for Yellowstone

Here to book rooms in the park at the Tetons & here for Yellowstone

Here to buy passes for Tetons & here for Yellowstone

Here for top 10 activities in the Tetons & Here for Yellowstone

Here for a map of the Tetons & here for a map of Yellowstone

Thanks for reading! I hope this helps you plan your own trip to these wonderful places!!

A Day at Joshua Tree Ntl Park

Hey Guys!

This post continues our trip from April 2018.

We spent time in LA, Malibu, Palm Springs and JTNP. I’ve decided to do 3 separate posts instead of just doing one long one.

Read my other posts on these areas here, here & here & Click here to see links to all of my blog posts

We flew in on a Mon and flew out on Sat. We spent our first day in Palm Springs and then our second day was spent at JTNP. This was my 2nd visit to the park but my hubby’s first.

The drive from Palm Springs to the Joshua Tree entrance takes approximately 45 mins. We chose this entrance because it’s the closest one to Palm Springs. There are 3 entrances to the park:

• The West Entrance is located five miles south of the junction of Highway 62 and Park Boulevard at Joshua Tree Village.
• The North Entrance is in Twentynine Palms, three miles south of the junction of Highway 62 and Utah Trail.
• The South Entrance near Cottonwood Spring is an access point along Interstate 10, 25 miles east of Indio.

Read here to see which entrance some people prefer and why & Click here to read about the park’s entrance fees

We’ve only entered from Joshua Tree village and exited out of the south entrance and based on my experience, I prefer the West entrance over the South entrance.

Last year when we visited, it was very hot but this year, it was a lot cooler. So, always check the temps before you head out.

I also can’t stress enough to always carry plenty of water with you on your hikes. JTNP is a very dry place and you can dehydrate quickly.

Click here & here to read about the grocery stores closest to the park & click here for the nearest restaurants to the park & click here for a complete visitors guide to the park

Tip: 25 mins from this entrance is Pioneertown which is a cool place to visit & 35 mins from the entrance is the Salton Sea and 1 hr from here is the San Bernardino National Forest .

Also, even if it’s hot during the day, the temps drop during the evening and you will need warmer clothing.

Image-1

One of the first things you will notice when entering from this entrance is the unusual Joshua Trees, also known as the yucca palm. There are 3 subspecies of Joshua Trees and they can only be found in the Mojave desert. Image-1

The Joshua Tree was given it’s name by a group of Mormon settlers who crossed the Mojave Desert in the mid-19th century. The tree’s unique shape reminded them of a Biblical story in which Joshua reaches his hands up to the sky in prayer.Image-1The largest Joshua tree on record was 80 feet tall and was estimated to be about 1000 years old.

Joshua trees typically grow more than 20 feet tall and may take 60 years to come to maturity and can live more than 500 years….wow!

JTNP is not a huge park and can be done in one full day…IF you don’t do a lot of hiking!

Click here for the best trails in the park & Click here to read about the not to be missed Hall of Horrors slot canyon

We didn’t do a lot of the hikes but the one I would definitely recommend is the Barker Dam trail.Image-1Image-1

It’s a 1.2 mi loop that takes you by a man made dam that was built in 1900 by cattleman as a water storage for their cattle.

It was raised in 1949 by rancher William F. Keys. An inscription at the top of the dam reads: “Big Horn Dam Built by Willis Keys, W.F. Keyes, Phyllis M. Keys, 1949–1950.”

Read reviews for this hike here

It is now a gathering place for desert wildlife, including many species of birds and bighorn sheep. The dam is listed on the National Register of Historic Places.

There are lots of hiking trails throughout JNTP.

Tip: Read here & here for the best Rock Formations in the park

They were doing trail maintenance when we visited so part of the trail was closed but you could still hike to the dam… you just had to go back the way you came instead of doing the loop.

The cacti were blooming once again during our visit.Image-1

As you get closer to the dam, coming from behind it, you can see an old cattle trough that was used years ago by the ranchers. Image-1

You keep walking past the trough a short distance and you will see the dam.Image-1

You continue walking past the dam until you see the water.

Last year, the water was so still that I was able to capture some amazing reflection shots. This year the wind was blowing so the water wasn’t as still but, nonetheless, I was able to capture some nice shots.Image-1Image-1Image-1

The water was noticeably lower than our last visit. I’ve read that some people have visited and there’s been no water at all.

Last year, we missed the ancient petroglyphs so I was determined to mark it off my list this trip.

We walked back the way we came and noticed a split in the trail and what appeared to be an information plaque…there are several on the trail.

So, we walked over and it was the location of the petroglyphs. Image-1

Sadly, they had been traced over with paint but there are other petroglyphs that can be found throughout the park.

This rock art site is believed to date back 2,000 years or more.

There were multiple movies filmed here in the 1940s and 50s…it is believed one of the productions painted over the original art in bolder colored paint to make the markings stand out in film.

Image-1

At this same stop, there is another trail head that begins at the parking lot that leads to a well preserved, old gold processing site.

It has remnants of a number of old cars that are slowly being absorbed back into the ground. It’s called the Wall Street Mill Trail and it’s approx 2 mi r/trip.

However, a second parking area, 0.3 miles up the trail, is located just off the unpaved Queen Valley Road. Starting from the first trailhead makes for a 2.15-mile round trip hike, which can be abbreviated to 1.55 miles by starting from the second trailhead.

We decided to pass on this hike.

After leaving this area, we headed to our next stop, Skull Rock .. It’s a cranial-shaped granite rock formation with 2 eye sockets created by erosion. It looks just like a skull!Image-1Image-1

We made several stops along the way to take pictures.

There are several places you can stop and have a picnic lunch or use the restroom. Image-1Can you spot me in the pic below? 😉

Image-1

The park has become a very popular place for rock climbers.

Image-1

Image-1

After Skull Rock, we headed to our next stop, Keys View.

It’s the highest viewpoint in JTNP and offers panoramic views of mesas, mountains & Coachella Valley.

There is a high concentration of Joshua Trees on the drive up to Keys View.Image-1

Once you arrive to the parking lot, you have to walk up a short but steep sidewalk to the viewpoint. The views were awesome!Image-1Image-1

Read reviews here

Next on the list was a stop at the Arch Rock. It’s a .3 mi hike that can be found at the White Tank Campground. We missed this stop during our last visit so it was another stop I had to mark off the list.

Click here for camp sites located in the park

If you’ve been to Arches National Park, you may be a little disappointed with this arch but I thought it was cool. 😉Image-1Image-1 This area was one my favorites. The landscape was incredible. Image-1Image-1Image-1

We saw several different kinds of lizards in the park but the most unusual one was spotted in this area…the chuckwalla.Image-1

After leaving this area, we continued our drive to the next stop, the Cholla Cactus Garden.

This area has the highest concentration of cholla cactus in the park..almost 10 acres. There is a 1/4 mi hike that you can do through the garden and it’s very easy.

Just a word of warning, do not touch or get too close to these cacti .. the slightest brush against them will cause the spines to dive into your skin, clothes or shoes.

The cholla detaches its joints onto unsuspecting animals and birds as a means of dispersal; when these joints fall off they create new stands of cactus.Image-1Image-1Image-1

After leaving the garden, we continued our drive to the southern entrance to exit the park.

Click here for some very useful information about the time and distance it takes between the entrances and stops.

We were still 20 mi from the entrance and the landscape changed a lot. It goes to flat back to rocky and then flat again.

We finally made it to the entrance and stopped at the visitors center. It was closed but thankfully the restrooms were still opened.

Image-1Image-1Image-1

Last year, we stayed inside the park until it was completely dark so we could stargaze. The park is well known for this as it has no light pollution. I’ve never seen so many stars in my life!

If you do stick around to stargaze. , which I highly recommend, you will need to be prepared for the much cooler temps in the evening.

Last July, the park was designated a “Dark Sky Park” due to the fact that is has no light pollution. Click here for a list of more dark sky parks.

Tip: Click here to read about where to stay if you are visiting the park & click here for the 13 best hikes in the park & here for 25 epic things to do in the park & here for 13 Cool things to do near the park

After exiting the park, we headed back to LA.

We were once again staying in the West Hollywood area. The drive back took around 2.5 hours.

On our way back to LA, we decided to stop off and grab a bite to eat.

So, we decided to stop at In-N-Out Burger. You can’t go to CA and not eat here. They have the most delicious burgers ever! We ate here last year too and let me just say, they are always busy!

My daughter tried her fries “animal style”…when you order your burger or fries this way, they add cheese and grilled onions.

If you don’t like burgers, then don’t stop here because that is all they serve…burgers, fries, milkshakes, soda and coffee..but the prices can’t be beat.

Click here to read some very interesting ways to order your burger and fries.

Image-1Image-1

After we finished eating, we continued our drive to LA and saw a beautiful sunset. What a great way to finish our day!Image-1

Thanks for reading! I hope you enjoyed JTNP and that this post will help you plan your own trip to the park.

Tip: Don’t miss the hike to the heart rock, the world famous Crochet Museum or The Station while visiting JTNP!!

Other nearby places to see while visiting JTNP:  Noah Purifoy Outdoor Museum, East Jesus, Anzo Borrego Desert State Park, Borrego Springs, Slab City & Salvation Mountain, Palm Springs, the Beauty Bubble Salon & Museum, Smiths Ranch Drive In Theater, Desert Christ Park, the amazing Integratron, the historic & famous Roy’s Motel & Cafe, Desert X, Antique Shopping, Palm Desert, and must not miss restaurants near JTNP

If you have any tips or suggestions, please feel free to leave a comment. 🙂

Read my next post on LA area and Malibu.

LA, Palm Springs & Joshua Tree Ntl Park

We visited LA, Palm Springs & JTNP for 4 nights in April 2017.

My daughter is a fashion blogger and had been begging me to go to LA with her.. I honestly had no desire to go but, I have to say, after going I really enjoyed it and would love to visit again one day.

We arrived in LA at 9:40 on a Tues morning. We rented a car from Alamo for less than $250.
enhanceAbout to land at LAX Airport

enhanceLook at all that traffic down there!

Tip – After making reservations online, you should keep checking prices on a regular basis to see if the price drops. I think we rebooked the car 3 different times due to the price dropping.

Also, when you rent from Alamo, they offer a “skip the line” service..this allows you to go straight to your rental car without going to the customer service desk to check in. To do this, you have to choose this option during or after you book your car online.

You then will have to enter your driver’s license info and payment information. I had used this service for the first time when we went to Hawaii and loved it!

Since we were only going to be in LA for 3 full days, I had us on a very busy itinerary. We left the airport and headed straight to the first stop which was the Urban Light Art Installation outside of the LACMA.

We only wanted to see the outside light installation and snap a few pics. The Urban Lights are 202 restored street lamps from the 1920’s and 30’s.

There is parking at the corner of Wilshire Blvd & Spaulding for around $15. enhanceWe also saw another art display in this same area that we weren’t expecting to see…part of the Berlin Wall. Read about this “art installation” here.

enhanceenhanceenhance
We were ready for lunch so we headed to one of the places you just have to go when in LA, In-N-Out Burger. They opened their first location in 1948..they now have over 300 locations. Their burgers are so good!enhanceAfter we ate, my daughter had several places that she wanted to go. With her being a fashion blogger, she had researched all the “trendy” places to go so she could shoot some pics for her blog.

So, we headed to Dinosaur Coffee. It’s located on Sunset Blvd. They are open daily from 7-7. My daughter ordered a coffee and loved it!enhanceenhance
1st pic above is a wall hanging inside the coffee shop

We then walked to the nearby Bates Motel. This is an old hotel that closed in the late 90’s. It was once the Sunset Pacific Motel but the locals refer to it as the Bates Motel because it sits on the corner of Sunset Blvd & Bates Ave.

A Paris based artist collaborated with the city of LA to turn it into an art installation by painting it all white. See what it looked like here.

I wasn’t impressed as it looked nothing like the pictures we saw online. It’s not opened to the public and was surrounded by a fence…looked more like a prison to me.

enhanceWe then headed to the Hollywood Walk of Fame. We wanted to see those iconic stars on Hollywood Blvd. The first stars were unveiled in 1958.

You can click on the link I added above and check the schedule for unveilings. They have several throughout the year and they are free.

It was very cool to see this area but it was so “seedy”. There were so many sketchy people hanging around and several would approach you trying to sell you something or try to get you to take a picture with them. I held onto my purse very tight!

We also saw them setting up for a movie premier in front of the Grauman’s Chinese Theater. You can click here to find out about upcoming movie premiers and a chance to see your favorite actor.enhanceenhance

enhanceI was ready to get out of this area pretty quickly! We then headed  back to our car to head to our next stop, the Hollywood Sign. It was about a 20 min drive from Hollywood Blvd. on Canyon Lake Dr.

There is a hike you can do where it takes you behind the sign but we didn’t do it.enhanceWe then headed to the Griffith Observatory. You can go here and see awesome views of LA and the Hollywood sign. We only visited the grounds and walked around the observatory…we never went inside. It’s a very cool looking building.

This place was extremely crowded and I recommend you get here early. There is parking in front of the observatory but you have to pay.

However, it’s very reasonable and worth the money. If you have to park in the parking area below the observatory, you have to walk uphill.

It was about a 30 min drive to get to the observatory from the Hollywood sign. The drive took you through a residential area lined with huge trees..they were beautiful!enhanceenhanceenhanceenhanceView of the Hollywood sign from the Griffith Observatory

After leaving here, we were ready to go eat dinner. We headed for the Grove Shopping Center. We had planned on trying out Umami Burger but opted for The Cheesecake Factory .

After eating dinner, we headed to our AirBnb apartment. This was the first time we had ever used AirBnb and I was very apprehensive after reading mixed reviews. I also don’t like reserving a property that I can’t cancel without a cancellation fee.

However, we were traveling with a friend and I thought it would be better if we had more than 1 bathroom for the 3 of us. The property I reserved was a 2 bedroom, 2 bath apartment in West Hollywood.

After much research, we felt it was the best location for all the things we had planned on seeing and doing while we were there. We really liked the W Hollywood area and felt we had made a good decision staying here. We rented this apt and paid around $970 for 4 nights.

We checked in and had a few hiccups during our stay that could have ended up worse than it did but the owner was very responsive to all of our issues and corrected them as quickly as possible. All in all, I would rent from her again. enhanceenhanceThe next morning we headed to Toast Bakery Cafe for breakfast. My daughter had picked out several restaurants that she had wanted to eat at and this was one of them. We arrived and got seated outside. We really loved the food and the atmosphere. enhanceenhanceenhanceenhanceAfter breakfast, we headed back to the Grove Shopping Center as my daughter had wanted to go to Laduree to purchase some of their macarons. They have the best!! enhanceenhanceenhanceenhance We spent a couple of hours here walking around through the shops and the historic Farmers Market. The farmers market first opened in 1934.

It has tons of restaurants & retail shops….mostly vendors selling local goods. I highly recommend you check this area out if visiting the LA area.enhanceenhance

enhanceAfter leaving the shopping center, we headed to some of the walls that my daughter had wanted to go and shoot some pics for her blog.

These walls are very popular with bloggers and instagrammers. So, we mapped out all of the walls that she wanted to shoot so we wouldn’t be backtracking.

The first wall was the “Girls Tour” wall. It’s located at 7811 Melrose…on the side of a boutique called, SorellaenhanceThe next wall wasn’t on the list but we spotted it after leaving the Girls Tour Wall.

It was an angel wing mural painted by the well known painter, Colette Miller. She has painted angel wing murals all around the world.enhanceThe next wall was the “Made in LA” wall. It’s located .3 mi from the Girls Tour wall at 8025 Melrose.enhanceThe next wall was the “Pink Wall”. This is one of the most “instagrammed” walls in LA. There is actually a sign by the wall with rules…one rule was that only cell phone pics could be taken…no professional cameras could be used.

They even have a security guard standing by the wall all day to make sure everyone follows the rules! enhanceWe then headed to the “Kiss Wall” which is literally right across from the Pink Wall. Unfortunately, they had painted over it with a different Mural.

It was cute but nothing my daughter was interested in…so, we headed to the next stop which was in the building that the new mural was painted on, Carrera Cafe.

This cafe will “screen print” anything you want on top of your coffee…even a pic of your pet, significant other, etc…it was very cool! Since I forgot to bring a pic of my hubby, I opted for the cafe’s own personalized print. 😉enhanceenhanceWe then headed to another coffee/tea place called, Alfred’s Coffee & Tea Room. We love coffee, ok? 😉 This place had really good coffee.enhanceenhanceenhanceNext we left this area and drove to Rodeo Drive. This is just one of those places you have to go when in LA. It’s a 2 mile long street lined with more than 100 luxury stores and hotels.

Go here to see the not to be missed places in this area including the Beverly Whilshire Hotel which was the backdrop for the film, Pretty Woman. It was also home to many famous actors.enhanceenhanceenhanceenhanceAfter walking around mostly window shopping, we walked to the nearby Beverly Gardens Park.The park features the Beverly Hills Sign which is one of the most photographed spots in the City.
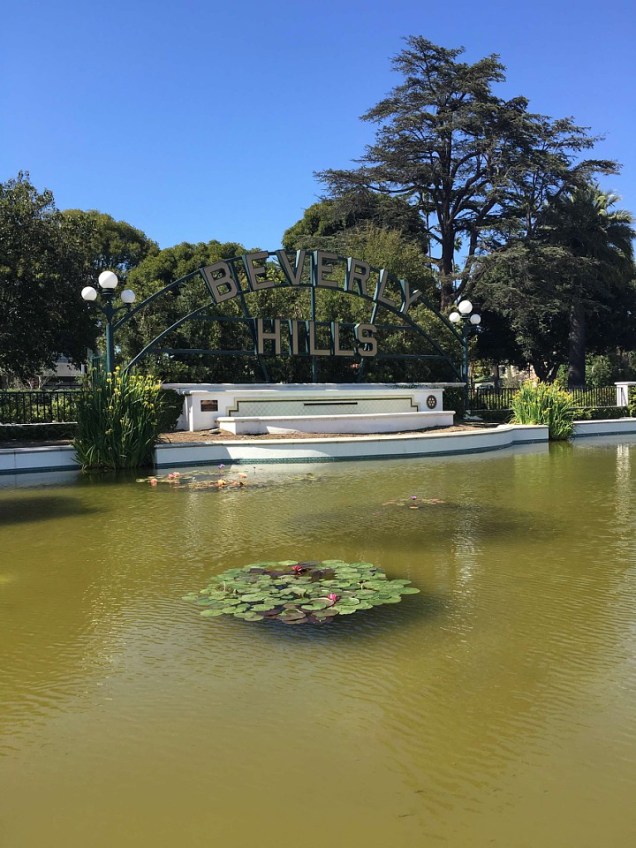
It also has a cactus garden, rose garden, 2 fountains, jogging trails, walking paths, arbors and huge trees!enhanceenhanceAfter the park, we headed to Alfred Tea Room for tea. Alfreds has several locations in LA and 2 in Tokyo. Well, my daughter just had to try their tea this time so off we went.enhanceenhanceWe then headed back to our hotel to get ready for our dinner reservations at The Ivy.

I had made reservations 2-3 weeks prior to leaving for LA and I would highly recommend you do the same. It’s a very popular place…just a warning, it’s not cheap! Book your reservation here.

It is one of the cutest, most colorful restaurant I’ve ever been! The food was delicious and the service was very good. enhanceThe only thing I didn’t like was having to sit so close to other people while I ate..the girl behind my head really didn’t want to be in our pic.

After dinner, we headed back to our apt to pack up and head to Palm Springs. I told my daughter that I would go to LA with her if she would spend one day with me at Joshua Tree National Park. 😉

After much research, I decided it would be best for us to drive there in the evening  hours so we wouldn’t run into all that horrible traffic you hear about in LA. I read the worst times to drive the freeway in LA was from 6 am – 9:30 am and from 3 pm to 7 pm.

So, to avoid having to get up super early, we opted to leave on Tues evening and spend the night in Palm Springs.

It was a 2 hr drive from our hotel in West Hollywood. Thankfully, we didn’t run into any traffic. It was a great decision!

I made reservations for the night at The Saguaro Hotel.

My daughter had talked about staying here because it was so colorful and knew it would be a good place to shoot some pictures. It really was the most colorful hotel I have ever stayed in. It was really cool!

The hotel is actually an old Holiday Inn (originally built as the International in 1977). The Saguaro converted it and opened the hotel under their name in 2012.

enhanceenhanceenhanceenhanceUnfortunately, we arrived so late that we went to bed soon after we checked in.

We woke up early the next morning so we could shoot a few pics of my daughter at the pool before we had to check out and head to Joshua Tree.enhance.jpegAfter we checked out, we headed to the Pink Door. It’s simply a pink door on a personal residence and it’s the only door I know of that has it’s on Instagram page! It’s located at 1100 E Sierra Way.enhanceenhanceAfter having to wait, on who we think was another fashion blogger, we finally got to snap some pictures ….we then headed to find a place to eat breakfast.

We finally settled on MOD Cafe. They had lots of breakfast items to choose from and it wasn’t too expensive. The service and food were excellent! Try a smoothie if you are ever here…they were delicious!

We sat outside and the views were spectacular!enhanceenhanceenhanceWe loved Palm Springs and hated that we didn’t have more time to spend here. There is a lot to do in/around this area. If you ever visit you can check out:

Palm Springs TramPalm Canyon DrRudy’s General Store MuseumCoachellaCoachella Valley PreserveIndian CanyonsPalm Springs WindmillsCheeky’s RestaurantSalvation Mountain (1 hr 45 mins from Palm Springs), The Sandwich SpotTramway Gas StationThe Movie Colony NeighborhoodCabazon DinosaursMarilyn Monroe StatueElvis Presley’s Honeymoon HideawayLiving Desert Zoo & GardensSalton Sea (1 hr from Palm Springs) & Pioneertown.

After breakfast, we headed to a nearby grocery store to pick up snacks and lots of water. I highly recommend you have a full tank of gas, plenty of snacks and lots of water before going into JTNP.

This whole area is very hot and dry. Wear a hat, sunglasses and lots of sunscreen and bring layers…it gets much cooler after the sun sets.

We then headed to Joshua Tree National Park. It was about a 45 min drive from Palm Springs. It was a beautiful drive! We passed the Windmill farm on the way.enhanceenhanceWe finally arrived and entered at what we think was the South entrance. Our GPS had us all turned around so we’re not sure which entrance it was as there are three different ones.

There is a $25 entrance fee per vehicle. enhanceThis park is so different than any other national park I’ve been to…it had a very barren landscape & was full of cacti.

It was very hot and dry and there were huge rocks scattered throughout the park. It was very cool to see those huge Joshua trees!

enhanceenhanceCan you spot the person in the pic above?

We were there in April so we saw a lot of the cacti blooming…enhanceenhanceWe drove through the park stopping along the way until we came to the Barker Dam hiking trail. It’s a very easy, flat 1.2 mi loop trail that leads you to a body of water.

The “dam” was built over a century ago by ranchers to store water for their cattle. It is now a gathering place for wildlife in the park including many species of birds and bighorn sheep.

We didn’t do our research before coming here as we missed the inscriptions on some of the rocks near the top of the dam that read, “Big Horn Dam Built by Willis Keys, W.F. Keyes, Phyllis M. Keys, 1949-1950.”

The Keys took it over in 1949 but it was originally built in the early 1900’s. We also missed an old horse trough and the Petroglyphs. We were unaware that this was a loop trail. So, we just walked to the dam and turned around and went back the way we came.

However, at the end of the trail, right before you head back to the parking lot, there is a sign for the petroglyphs. The main area of the petroglyphs is right behind the sign in a big rock that appears to have a part cut out of it.

I guess this just means that I have to make another trip to the park 😉 I highly recommend you do this hike. The reflections of the rocks in the water were amazing the day we went!enhanceenhance

enhance

enhanceWe then headed to Skull Rock.

It’s located along the main east-west park road and is a favorite stop for park visitors. A parking spot is located just across the road from the rock.

For those wishing to stretch their legs, a 1.7-mile nature trail begins either just across from the entrance to Jumbo Rocks Campgroud or inside the campground, across from the amphitheater.

enhanceenhanceAfter leaving here, we arrived at the Cholla Cactus Garden. We had wanted to stop at the Arch but somehow missed the sign for it.

The cactus garden has a very short and easy 1/4 mi loop trail and I highly recommend you stop here. The concentration of cacti in this area was amazing!enhanceenhanceAfter leaving here, we made it to a different entrance…we stopped and snapped a few pictures before heading back into the park.

We had planned on staying in the park until it was dark as I had read that the stargazing in the park was amazing because it had no light pollution.enhance

enhanceThree months after visiting the park, it was named a Dark Sky Park. Joshua Tree has some of the darkest night skies in the United States.

In July 2017, it was certified as the 10th International Dark Sky Park in the U.S. National Park system. Others include Death Valley, Big Bend and Grand Canyon national parks.

After driving back into the park, we found a place to park. We got out of the car and walked around and took more pictures until it was completely dark.enhanceenhanceenhanceUnfortunately, I didn’t have a camera that would shoot night photography but the sky was absolutely amazing and I had never seen so many stars in my life! I highly recommend you stay in the park to see the stars and possibly the Milky Way.

After leaving the park, we headed back to LA. It was about a 3 hr drive.

The next morning, which was our last full day in LA, we headed to California Donuts for breakfast. It was a 20 min drive from our apt. They were delicious! enhanceenhanceenhanceWe had a full day planned so we needed lots of sugar to keep us going. 😉

We then headed to Venice Beach. We had planned on spending a few hours here before heading to Malibu for dinner.

Tip – Get here early as the parking lot fills up very quickly!

The first thing we did after arriving was walk out to the pier.  There were lots of people fishing at the end of the pier…probably why so many birds were hanging out here too.

enhanceenhanceenhance

enhanceWe then headed to Venice Beach Rentals to rent a bike. I was VERY apprehensive about doing this as I hadn’t ridden a bike in years.

However turns out, It was so easy and fun! It was one of the highlights of the trip for me. The bike path was paved and very flat.

The cost was around $30-35 for an all day rental. You could rent for 1, 2 & 3 hours or all day. We didn’t know how long we would be there so we felt it would be safer to rent all day.

I can’t say this enough, DO IT! It was so much fun…but don’t do it in white pants! At one point, I got off my bike and the very greasy bike chain rested against my pant leg…need I say more?

We rode our bikes down to Santa Monica Pier so we could ride the ferris wheel. We were given a lock and chain with our bike rental so we could keep our bikes chained whenever we had to leave them.

Venice Beach is a very interesting place. It has lots of funky shops, street performers and colorful murals. There’s also a skate park and Muscle Beach Gym. Lots of sketchy people hang out here but we never felt unsafe.

enhanceenhanceenhanceenhanceenhanceI had to pick a bike that matched my outfit. 😉 Seriously though, do I look like I should be riding a bike dressed like this?

After spending a few hours at the beach, we headed to Lemonade for lunch. This was another place my daughter had put on the list to try out.

It’s a “cafeteria style” restaurant with lots of healthy options. They first opened in 2008 and now have 28 locations throughout LA and the surrounding areas.

The restaurant was so bright and clean…it just made you feel good to be here. The food was so good! You have to try their lemonade!enhanceenhanceenhanceenhanceAfter lunch, we headed to 3rd Street Promenade to check out the shops. The area consists of three open-air, car-free blocks that have unique shops, some well known ones and a few restaurants.enhanceenhanceWe then headed back to the car. We were driving to Malibu to spend a few hours there before our 7 pm dinner reservation at Malibu Farm. It was yet another restaurant pick by my daughter.

We made reservations online a couple of weeks prior to leaving for LA and I would recommend you do the same if you plan to eat here.enhanceDriving down the Pacific Coast Hwy headed towards Malibu.

Our first stop was Zuma Beach. It was a beautiful, wide beach with lots of parking. It only cost $6 to park. There were several bathrooms and a snack bar located at this beach. Read reviews hereenhanceenhanceWe didn’t get to spend a lot of time in Malibu so we basically drove around stopping when we saw anything that caught our eye.

After we left Zuma Beach, I spotted wildflowers blooming all over the cliffside.enhanceenhanceWe then headed to the restaurant for our dinner reservation. Malibu Farm is a farm to table restaurant offering locally sourced American cuisine with pier side Pacific views.
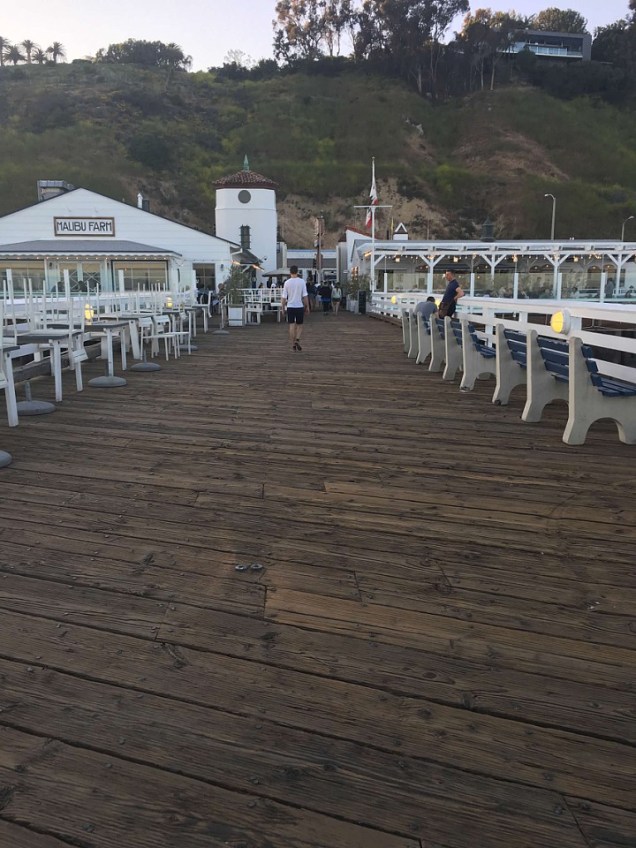
enhanceenhanceI ordered the stoplight tacos trio. They were very good.enhanceMy daughter ordered the grass fed beef burger. She thought it was very good. Check out their menu here and read reviews here.enhanceAfter dinner, we walked out to the pier and enjoyed the views and the sunset.enhanceWe then headed back to West Hollywood..we decided we would have dessert since we had eaten so healthy for dinner. We headed to The Milk Shop.

My daughter had found this place during her research and they had “instagram” worthy desserts so she just had to go. We both ordered an ice cream macaron dipped in fruity pebbles. It was so good!enhanceenhanceenhanceWe then headed back to our apartment and packed. We were flying out the next morning. enhanceLeaving LA enhanceLanding in Las Vegas – we had a layover here. Is anyone else amazed by the landscape views from the airplane?

It amazes me and I take tons of pics from the plane. My hubby loves going through all of our vacation pics! 😉enhanceLeaving Las Vegas and flying over Lake Mead enhanceFlying over the Grand Canyon

Thanks for reading! I hope this helps you plan your own trip to LA, Palm Springs and/or Joshua Tree.


Aruba

Hey guys!

We visited Aruba in Nov 2017 and spent 6 nights on the island.

Tip: Click here to read about entrance requirements for Aruba – the ED card is mandatory for every passenger entering Aruba, including babies and kids, and needs to be filled out and approved. Click here to read about Global Entry.

We had initially booked a trip to Turks & Caicos but after booking our trip there, the island was hit by two hurricanes so we decided to change it to Aruba.

We had never been to either island and after finding out that Aruba was outside of the hurricane belt we felt it was a better option. Thankfully, we had booked our airfare with Southwest  (my favorite airline).

Southwest allows you to change your flight online without a change fee. You only have to pay the difference if the airfare is higher than your originally booked flight.

Our airfare to Aruba ended up costing us an additional $35.

enhanceOur first view of the island

After reading lots of terrible reviews on the car rental places inside the airport, we chose to book with an offsite car rental company called Wheels 2 Go.

I was a little hesitant because I don’t like having to prepay for my car rental..especially with it being an international rental; I wasn’t sure what would happen if I needed to cancel.

They picked us up right outside the airport and the driver took us to our rental car at a parking lot a couple of miles from the airport.

Tip: Read here for tips for navigating the airport

It was definitely a different experience than any rental I’ve ever had before as the car was sitting in some random parking lot and not at an actual rental business. Thankfully, it turned out to be a really good experience and I would definitely recommend them.

We rented a midsize car for 6 nights and the cost was $234.

Tip: Click here for everything you need to know about driving in Aruba & here for the best car rental companies in Aruba

After a lot of research, we decided to stay at the Modern Hotel Aruba. It wasn’t on the beach but we were ok with that since we like to spend most of our time exploring.

We try to find smaller properties when possible as I am not a fan of crowds. This place only had around 7-8 rooms so it was very quiet and we hardly ever saw anyone else there.

We had the Penthouse suite, which is their largest suite. It has a “private” balcony and a huge bathroom with a shower and tub. I would highly recommend this property!

enhanceenhance

This slideshow requires JavaScript.

Read reviews here

You could walk to Palm Beach from our hotel but I wouldn’t recommend it as it would have taken at least 10 mins or more and you had to cross a main road to get there.

I mean who wants to walk in the heat with all of their beach gear and risk getting hit by a car? 😉

Tip – Download the WhatsApp as most everyone in Aruba uses it. We had to use it on 3 separate occasions to communicate with people on the island. Click here for the best Aruba app & here for their food delivery app & here for a self guided tour app

After checking into our hotel, we went to Super Food to pick up a few items. This is a really nice grocery store and it’s huge!

To have your groceries delivered click here & here & for the 3 best grocery stores in Aruba click here

Click here to see a list of all the stores to shop in Aruba

I highly recommend you purchase plenty of water and keep some with you at all times. Aruba is a very hot, dry island and you can quickly become dehydrated. Also, take lots of sunscreen and wear it!!

Tip: For the best reef friendly sunscreens click here and here

We then headed to Oranjestad which is the capital of Aruba to find somewhere to eat. It was about a 20 min drive from our hotel. We ended up eating at Dushi Bagels & Burgers.

I ordered the coconut shrimp and the hubby ordered the usual burger. I wasn’t very impressed with this place. My shrimp tasted like it had little to no coconut on it and my hubby’s burger was too well done. enhance

Read reviews here

After we ate, we walked a very short distance to a nearby beach to watch the sunset. To get there, we had to walk through the Playa Linda Beach Resort’s lobby.

I had read about the spectacular sunsets in Aruba but unfortunately we never saw anything like I had seen in pictures. Still beautiful though!

enhanceenhance

Other nearby beaches in this area include Druif, Palm, Eagle, Hadicurari, Divi, MancheboMalmok, Boca Catalina and Arashi. All of these beaches are within a 10 min drive or less of Dushi Bagels & Burgers.

The next day we had planned on exploring Arikok National Park.

Since we wanted to see the Natural Pool, we had rented a jeep for the day.

Read reviews of the park here

Tip – Do not attempt driving to the Natural Pool without a 4WD and make sure it has good tires and is in good mechanical condition.

You could easily blow a tire and be stranded and a lot of the rental companies don’t cover you if you drive here. There are several tour companies that offer tours if you choose not to drive it.

After researching the best places to rent a jeep on the island, we reserved a jeep with More4Less.

The total cost for the day was $175 for a 4 door jeep. They did have cheaper options available but this is all they had left when I booked.

Tip – Book your jeep before you arrive. They book up quickly!

It was a bit steep but cheaper than booking with a tour co and we got to explore the park on our time.

The rental co picked us up at our hotel at 9 am the next morning and drove us back to their rental location in Oranjestad to pick up our jeep.

After arriving, the process took about 15 mins. While there, they told us about this app called Maps.me and let me just say, it was a lifesaver! It’s a GPS that works off-line so it doesn’t use your data.

Tip: You can download the Airalo app and purchase an Esim card for data – the cost is $9 for 1 GB of data

The island is not easy to navigate. There are very few road signs and lots of roundabouts. This app worked perfectly and never steered us wrong… I highly recommend you download it!

I would highly recommend More4Less…..they were great!

We arrived at the Arikok Ntl Park’s Visitor Center and went in to check it out and to pick up a map of the park. You have to pay an $11 pp entrance fee before entering the park. There are also maps available at the entrance gate which is right beside the visitors center.

Tip- Have plenty of water, a full tank of gas, sunscreen and snacks.

enhanceOur first stop was the beautiful Natural Pool. It took about 30-45 mins to arrive and it was a stressful drive! We drove over so many sharp rocks…I just knew we were going to blow a tire!

You can book a tour to the Natural Pool here.

enhanceenhanceI was so ready to get out of that jeep..I felt like I was going to have some kind of internal injuries after that drive!

Thankfully, it wasn’t too crowded when we arrived. This place is very popular with tourists and can get really crowded during the day so try to get here early or later in the evening. enhanceenhance

This slideshow requires JavaScript.

This place is beautiful….But it can be very dangerous. Please be very careful as there have been deaths in this area.

Tips:

  • The rocks near the water’s edge can be very slippery. I recommend you bring water shoes
  • Never swim outside of the protected pool. The surf and tides can be very dangerous
  • Bring a wet bag for cameras and cell phones because waves crash over the walls of the pool and can get your things wet if you leave them on the rocks.

Read reviews for the Natural pool here

After leaving the pool, we then headed to the Boca Prins Sand Dunes & Beach.

We stopped along the way snapping a few….thousand pics! 😉

enhanceThere were goats all over the park!

enhanceWe first arrived to the Boca Prins Sand Dunes….they looked so out of place.

enhanceenhance
We felt like we had the park to ourselves most of the day as we hardly ever saw anyone else. It was nice to escape the crowds.

We then headed just a short distance to Boca Prins Beach. It was beautiful but it’s definitely not a swimming beach. There are signs warning you not to swim here.

enhanceenhance

This slideshow requires JavaScript.

There is actually a very small restaurant located near here called Boca Prins Bar & Restaurant. – UPDATE: This restaurant is now closed

Our next stop was the Fontein Cave. It’s one of the only caves on the island that has ancient writing on the cave walls. There are park guides that will give you a short tour.

We saw bats flying around in both of the caves that we visited but more so in this one..

Within walking distance of the cave is a small pond where you can sit and put your feet in the water and get a “fish pedicure”..I just had to try it! Don’t be scared..it just tickles!enhanceenhance

This slideshow requires JavaScript.

Tip – This cave doesn’t stay open all day long. It has a gate on it and they close it around 5-6 pm I believe.

Read reviews here

We then headed a short distance to the next cave called Quadirikiri. It’s a lot bigger than Fontein.

You will need to use a flashlight as it’s really dark until you get near the back of the cave where there are holes in the top of the cave that lets light shine through.

enhanceenhance


This slideshow requires JavaScript.

This cave doesn’t close like the Fontein cave.

Read reviews here

Next, we headed to Vader Piet which is simply a wind farm. enhanceWe stopped and took pictures along the way to Baby Beach and spotted this huge red anchor so of course we had to stop and take a pic. 😉

It stands there in memory and in honor of all seamen who have lost their life at sea.

It’s approximately 10 feet 6 inches wide and 15 feet, 6 inches tall.

enhanceAfter being in the heat and desert like conditions all day, we were ready to cool off in the beautiful waters of Baby Beach.

enhanceenhanceWe stayed here to watch the beautiful sunset.

There is food available at this beach. There’s a place that sells just hotdogs and hamburgers and there’s Big Mama Grill where you can order a variety of food items.

The next day, we decided to explore the other side of the island.

But first, we headed to breakfast at Taste of Belgium.

This place was really close to our hotel so we decided to try it out. The food and service was really good. We ate breakfast here twice.

Read reviews here

For the best restaurants that serve breakfast click here

enhanceenhanceAfter breakfast, we headed to the California Lighthouse.

The lighthouse was named after the S.S. California which sank prior to it’s construction in 1910.

The lighthouse is a popular location to watch the sunset.

You can also tour the lighthouse for $10. Purchase tickets here.

There is also an Italian restaurant located here called Faro Blanco. The Faro Blanco Restaurant was once the dwelling of the lighthouse keeper but now serves Aruba and it’s guests the best in Italian cuisine.

Read reviews here

The restaurant has some amazing views if you are seated outside. We never had the chance to try it out.

enhanceenhanceenhanceThe next stop was the Alto Vista Chapel.

Our Maps.me app took us down this very bumpy road that I think may have been meant for 4WD but we made it just fine in our little rental car.

enhanceWe made a few stops along the way before we got to the church. We passed these big boulder fields along the way.enhanceOf course, once we spotted this big black rock that was almost perfectly round, we had to stop and take pics.enhanceenhanceWe finally arrived to the church. I think it took us around 25-30 mins or so to get there from the Lighthouse.

We later found out there was a different route that we could have taken however, I liked the road we took because it was much more scenic.

The church was built in 1750 and reconstructed in 1953. enhanceIMG_0149

Tip: Another church worth visiting is the Lourdes Grotto..it’s a Roman Catholic shrine that was built into the rocks. Read reviews here. It’s located 35 mins from this church in San Nicolas.

In front of the church, there was this little stand selling fresh squeezed lime so we decided to try it out…it was so refreshing!

IMG_0165We then headed to the Donkey Sanctuary .

The sanctuary was founded in 1997 and is a non profit organization ran completely by volunteers.

The donkeys in Aruba were brought to the island over 500 yrs ago as a mode of transportation but as cars were introduced to the island the use for donkeys drastically declined.

They were left to fend for themselves and almost became extinct after an illness killed all but 20. They have now increased in numbers and have a safe place to live. It is free of charge but you can leave a donation.

Read reviews here

enhanceenhanceWe then headed to the Natural Bridge.

The largest and most photographed natural bridge collapsed in 2005. However, it’s still a popular tourist attraction and the baby bridge can also be seen here.

Read reviews here

enhanceenhanceThe collapsed bridge

You can purchase food and drinks here. They mainly sold hotdogs and hamburgers. We ended up eating lunch here and the food was not that good.

Click here for the 10 best restaurants near the Natural Bridge.

IMG_0184We then headed to the Bushiribana Gold Mill Ruins.

The gold mill was built in 1874 during the “gold rush” in Aruba.

Read reviews here

enhanceenhance

This slideshow requires JavaScript.

There is a refreshment stand at the site of the ruins.

Tip: Read here about some hidden gems including a nearby hidden cave pool that you can swim in…AKA Cave pool. Read here about a tour that includes the hidden cave along with the Eyes of God and Black Sand Beach.

We then headed to the Ayo & Casibari Rock Formations. This is a cluster of huge rock formations. They were really cool and best of all, they were free to visit!

There are several short paths you can walk along. There are also stairs that have been built into the rock where you can go all the way to the top for some spectacular views.

Some of the stairs were extremely terrifying because they were so steep!

Rock drawings dating back thousands of years can also be found here.

Read reviews here

enhanceenhanceAt the top, you get an amazing view of Hooiberg It’s a volcanic formation located in the center of Aruba and is the 2nd highest point on the island. You can walk to the top of Hooiberg if you want to walk up almost 600 steps! No thanks!

Read reviews here

The highest point in Aruba is Jamanota, a hill located in the Arikok National Park that stands at 189 meters above sea level.

enhanceWe then headed back to our hotel to get ready for dinner.

After dinner, we headed to Arashi Beach to watch the sunset. This was one of our favorite beaches.enhance

The next day we decided to spend snorkeling and just relaxing at the beach. We went to Boca Catalina.

Unfortunately, our snorkeling experience in Aruba wasn’t that great.

The water was always murky. We did, however, get to see an octopus for the first time.

enhance

enhanceSince the snorkeling wasn’t that good, we decided to go back to Arashi Beach.

The water at Arashi is great for swimming but the snorkeling here is more for advanced swimmers and snorkelers. We didn’t attempt to snorkel here.

We loved this beach…it was never crowded.

enhance

enhanceThe next day, I had surprised my hubby with a couples massage at the  Renaissance Hotel’s private island.

The hotel was located in Oranjestad. It was about a 20-25 min drive from our hotel.

The spa has several different packages you can choose from. I purchased the Caribbean  Morning Couples Package. It included a 50 min massage for two, use of the private spa cove from 9-11:30, use of beach towels and water floats, a fruit tray and 2 drinks each.

Tip: There is an additional charge of $25 per person for non Renaissance guests.

They do offer spa treatments at the hotel as well as the private island. If you stay at the Renaissance, the ferry to the island is free. If you purchase a spa treatment at the island, the ferry is included in the cost.

Tip – The private island is only for the guests of the Renaissance Aruba Resort & Casino. However, if the hotel isn’t at 80% capacity or more, they will sell day passes for $125 for adults & $62.50 for children ages 5-12 (price includes lunch)but you have to either call or go to the hotel on the day you want to visit to check for availability because I don’t think they sell advanced tickets. Read all about how to get to the island here.

I would recommend if you want to visit the island, that you either book your entire stay at the hotel, book at least one night at the hotel or book a spa treatment.

I can’t say this enough, if you go to Aruba, you need to go here!! It was truly the highlight of our trip! It’s a 40-acre private tropical retreat with white sand beaches and crystal clear waters and it is beautiful!

Read reviews here

Our massage was at 9 am but we had to check in at the spa inside the hotel at 8 am. The only place to park was across the street from the hotel. After we checked in, we had to walk back across the street to catch the ferry.

Tip – If you stay at the hotel, the ferry picks you up inside the hotel…very cool.

The ferry runs every 15 mins … It’s a 8 min ferry ride to the island. One side of the island is for families and one side is for couples.

As some of you may know, there are 6 beautiful flamingos that reside on the island and you can feed them right on the beach.

Tip: De Palm Island also has flamingos  – click here to see how to get to the island & here on a detailed blog post about the island

We arrived about 30 mins before our massage so we spent some time feeding and taking pics of them. Flamingos can only be found on this island and nowhere else in Aruba.

enhanceenhanceTip– I recommend if you book a massage that you book the earliest time available to beat the crowds that are all fighting to get their pic made with the flamingos. There was hardly anyone there when we arrived.

We then walked over to our BEAUTIFUL private bungalow right on the water to prepare for our massage. The therapists were already there waiting on us.

enhance

enhanceThey explained what we needed to do and then walked outside so we could shower off and get on the massage tables.enhance

Tip– Make sure you have NO sand on you when you get ready for your massage or you may not have a pleasant experience.

Unfortunately, I still had a little sand on my feet and even though the therapist tried dusting it off, not all of it came off and I could definitely feel it when she began the massage.

This could have been prevented if they would have started the massage with my back and not my feet. I’ve never had a massage where they started with my feet.

I was a little worried about booking this for my hubby because he had never had a massage before but he ended up loving it and said he needed to start having more of them!

This slideshow requires JavaScript.

There were lots of private little bungalows all over the island and I’m not sure if it was first come, first serve or if you had to reserve them through the hotel. There were also hammocks randomly placed throughout the island.

enhanceenhanceThis was a splurge for us because we were celebrating our 29th yr wedding anniversary but I loved it so much that I would definitely pay to do it again even if it wasn’t a special occasion!

Tip – You can actually book a dinner under the stars on the island even if you aren’t a guest of the Renaissance hotel. The dinner is served on the beach every Wed at 7 pm. The cost is $65 for adults and $33 for children ages 5-12.

After leaving our private bungalow, we headed to the Papagoyo Bar & Grill for lunch. I ordered the grouper sandwich and the hubby ordered his usual burger. The food and service was great!

You couldn’t beat the views either!

After lunch we walked around the island.

Not only did the island have flamingos, but it also had tropical fish and iguanas.

After spending ½ the day here, we ferried back over to Oranjestad. I had also surprised my husband with a 5 hr private sailing tour that included dinner, snorkeling and a sunset with the Morning Star.

I had read rave reviews about it and decided to book it before we left on our trip.

Unfortunately, the weather had been calling for rain that day and sure enough it had rained quite a bit in Oranjestad but thankfully not on the private island.

Sadly to say, I received a text message from the owner of the boat canceling the tour due to the weather. Aruba is usually a very windy island but they had been having very little wind.

So, on top of the rain and no wind she felt it was in our best interest to cancel. Needless to say, I was VERY disappointed.

So, we ended up staying in Oranjestad and walked around checking out the shops & outside marketplace. enhanceenhance


Tip – Click here and see how many cruise ships will be in port each day. You can then avoid the crowds.

We then headed to Mangel Halto Beach just to check it out.

This is supposed to be a great snorkeling area but we never snorkeled here. It was really beautiful and the water was really calm and clear.enhanceenhanceRead reviews here

Later, we headed to Savaneta to eat dinner at Zeerovers.

We had tried to eat here earlier in the week but they were closed.

We later found out that the only day they close is Mon. This is a seafood place and they only sell whatever fish was caught that day.

This place gets very busy so I would recommend you get here early. It’s a very popular place with tourists and locals.

You order your food at a small window as soon as you walk into the restaurant. After paying, they hand you a number and then you go find a table.

They sell a variety of fish but you never know what kind it will be. It could be grouper, red snapper, amberjack etc. It’s usually more than one kind.enhanceThey also sell shrimp. You have to tell them how many pounds you want of each(if you want both). The guys that took our order were good about gauging the weight based on the number of people you were ordering for.

They weigh it, put it in a bag and then it all gets cooked together…everything is fried. It’s served with fries. They also have plantains and cornbread.

Make sure you order the tartar sauce…it was so good!

Tip – They only take cash.

The food was really good but VERY messy…be prepared to get your fingers dirty!

Read reviews here

enhanceenhanceWe sat at a table right beside the water and as we were waiting on our food, the local fishermen pulled up in their boats to drop off their catch of the day. enhanceenhanceFunny story…after dinner, we went to leave but then decided to walk down beside the restaurant to take a picture of the sunset. There was a house beside the restaurant that, unbeknownst to us, was the house of the restaurant owner’s sister.

She came out and started talking to us…She then invited us to come into her house where she began telling us that it was the house she was raised in. She was probably in her 70’s. Well, then one of her brothers walks up and joins in on the conversation.

He then takes us over to his house, which was next door, and introduces us to his wife. He is also a swim coach in Aruba and trains kids for the olympics. His name was Roly Bisslik.

His sister then asked us to stay for coffee but we told them we had to get going. It was such a neat experience. They were such a sweet family.

We should have stayed because we ended up stopping at the Hub Coffee & Juice Bar. The coffee was really good and I’m picky about coffee.

The next day was our last full day in Aruba. We really didn’t have anything planned but when we woke up that morning it was pouring rain.

We decided to get out and ride around. We knew the rain probably wouldn’t last long. We headed to Eagle Beach. It’s been voted the 2nd best beach in the Caribbean and the 3rd best beach in the world!

It’s also home to two of the most photographed and renowned fofoti trees in Aruba.

My husband apparently thought he could fly… 😉enhanceenhanceWe then ended up driving to the Bubali Bird Sanctuary.

It wasn’t easy to find and we drove around in circles for a while.

Read reviews here

IMG_0325IMG_0310We saw about 4-5 different types of birds along with a turtle. There’s an observation tower you can climb for better views but we didn’t climb it.

After we left here, we noticed this place right on the side of the road that looked like it had shells. So, we pulled over and got out. The place was covered in coral and shells!

It’s located just north of the windsurfing area. You can see an old rusted out ship sticking out of the shallow water.

enhance

enhance


We then headed out to find lunch.

We came across a place right on the water and decided to give it a try. It was called The West DeckenhanceWe first ordered the grouper fingers and the fried funchi (similar to corn bread) with dutch cheese. The menu said it was a “must on the Aruban table” so we had to try it. Both were delicious!

enhanceWe then ordered the fish sandwich….it was so good! We both agreed that this was one, if not the best, meal we had in Aruba.

The service was excellent …very friendly people. I can see why they call Aruba “one happy island”…everyone seemed happy and were all very friendly.

enhance
After we ate, we headed to a nearby beach to spend the rest of our day and hoped to see a beautiful Aruban sunset.

Sadly, once again, it was cloudy and we never got to witness that big orange ball sinking into the sea. However, every sunset in Aruba is beautiful. enhanceMy hubby is a burger connoisseur …he loves burgers and always researches the best place to get one anytime we go anywhere. So, during his research, he came across this place called Juanchis Burger.

So, for dinner that evening, that’s where we headed. It was located very close to our hotel in the Palm Beach Plaza Mall.

We both ordered the baby portobello burgers with an order of fries sprinkled with a garlic parmesan cheese. The burgers were awesome! So good! enhanceenhance

enhanceRead the reviews on this restaurant here. UPDATE: This place is now closed.

After dinner, we headed back to our hotel and called it a night….sadly, we would be flying out the next day.

The next morning, we headed back to Taste of Belgium for breakfast.

This place is also located in the Palm Beach Plaza Mall.

We then headed back to the hotel to pack up. We checked out of the hotel around 11 am.

We had a few hours to spend on the island before our plane departed.

So, we decided to drive back down to Eagle Beach. It was about a 10 min drive from our hotel.

When we arrived, there was this amazing dark cloud in the sky. It made for some great shots.enhanceenhanceenhanceAfter spending some time here, we headed out…but about that time, I told my husband that it looked like a water spout was forming. I had never seen one in person so I was really hoping that’s what was happening.

Sure enough, by the time we got parked again, one had formed! It was so cool to actually see it in person!

enhanceI only had time to snap a few pictures with my iPhone before it dissipated so the quality isn’t the best.

It was a great way to end our time in Aruba!

We then headed back to the parking lot where we had initially picked up our rental car. The rental company was meeting us there so we could drop off the car and then they were going to drop us off at the airport.

We had a great time in Aruba and I highly recommend you visit this beautiful island.

enhanceGoodbye Aruba..it was fun!!

Click here to see links to all of my blog posts

Other things to do while you are there::

Every Tue they hold what’s called a Bon Bini Festival in the outer courtyard of the historical museum near Ft Zoutman.  You can also climb the stairs of the fort for 360 degree views.

Shopping – Seaport Marketplace Mall and Seaport Village click here for more

Sea glass Tour

Wilhelmina Park – lots of lizards hanging out

De Palm Island – Aruba’s only all-inclusive destination offering something for everyone! Enjoy body drop slides, a kids waterpark, snorkel tours, an underwater helmet walk, banana boat rides, beaches, and more. – Read reviews here

Ostrich Farm  – read reviews here

Butterfly Farm – read reviews here

Behind the boat docks in downtown, fishermen can be seen cleaning their catch of the day. You can also see large pelicans near the yacht slips.

Eagle Beach – most popular and widest beach & home to 2 world renowned Fofoti Trees

Palm Beach – pretty but crowded and not good for snorkeling

For a complete list of photographers in Aruba click here

For a luxury picnic on the beach click here

For a list of events in Aruba click here

For the best spas click here

Street Art in San Nicolas

St Ann’s Catholic Church

Philips Animal Garden – Read reviews here

Kukoo Kunuku Party Bus – Read reviews here

The Trolley – The trolleys offer free transportation to and from the main street downtown area in a loop with the cruise ship terminal. The streetcars can be boarded right outside the cruise port’s main gate.

Click here for 72 fun things to do in Aruba & here for 25 more things to see/do

Best snorkeling beaches: Arashi, Boca Catalina (small bay in the Malmok beach area), Catalina Cove (close to Boca Catalina – you have to enter the water at Boca then swim north – swim along the edge of the coves to see fish). Baby Beach – warning: the currents can be strong here, Mangel Halto – 4 star snorkeling but must be a good swimmer – located in the city of Savaneta. Tres Trapi – next to Catalina Cove(has 3 steps in the rocks to get into the water – apparently lots of colorful starfish here). We checked out Tres Trapi and there is no way I would have gotten in the water here….the water was very rough. Maybe it’s usually calm but not the day we went.enhance

Click here for top 10 beaches in Aruba

Click here for best restaurants in Aruba

Click here for the 10 best wedding venues

Click here for most romantic things to do in Aruba

Click here & here for most popular tours in Aruba

Click here for most popular hotels in Aruba

Click here for best things to do with children

Click here & here for very useful Tips for traveling to Aruba for the first time

Click here to find out about 3 hidden gems in Aruba that most don’t know about

Click here for 16 facts that may surprise you about Aruba

Click here for a list of all the beaches in Aruba shown on a map

Click here for 13 things to know before you visit Aruba

Click here for 14 things NOT to do in Aruba

My own suggestions for romantic things to do: Watch the sunset at the lighthouse, book a private dinner on the beach, book a couple’s massage on the beach, take a stroll on the beach during sunset, book a private sunset cruise, have breakfast/dinner delivered to your room & stay in, have a picnic in a secluded area or on the beach during sunset, take a horseback ride on the beach or take a midnight swim in the pool..I would say ocean but I’m terrified of sharks so I can’t recommend! 😉

Thanks for reading. I hope this helps you plan your own trip to Aruba!

If you have any ideas or suggestions, please feel free to leave a comment.

Banff & Yoho National Parks

Hey Guys!

Due to this trip being 8 days I’ve decided to do 2 separate posts. One for Banff and Yoho and then one for the Icefields Parkway and Jasper. We did 4 full days at Banff & Yoho. We visited in July 2017.

Update: Read my post on Jasper & the Icefields Parkway here & Click here to see links to all of my blog posts

In my 2nd post, I will also include a day by day itinerary that may help you plan your own trip. I spent countless hours researching, planning and mapping out locations. Try downloading the app, Maps.me. We used it in Aruba and it was a lifesaver!

We flew into Calgary and rented a car from Enterprise. The cost was around $480 for a full size car through Expedia.

Tip – check both the online travel sites and the car rental agency’s site to compare prices. We drove from Calgary to Banff  which takes approximately 1 hr.

It was late when we arrived so we went straight to our hotel, Irwin’s Mountain Inn. We only stayed here the one night as we moved around often to be able to see and do as much as possible.

Read reviews here

Sunday was our first full day in Banff. We woke up and headed to Melissa’s Missteak for breakfast. This place is so good! We ate here 2-3 times.enhanceenhance

Read reviews here

The first day in Banff we visited the following locations: Bow Falls  (you can park and walk a path along the Bow River or you can park at the falls) & the Banff Gondola ($62 pp adult or $56 if booked in advance – $31 or $28 for children – check site for free rates for children).

Let me just say, the gondola was extremely crowded so I highly recommend you get here early and check the weather before you go. If it’s cloudy, you won’t see much. We didn’t buy our tickets in advance so we stood in a very long line.

They have food and drinks inside and at the top. The gondola ride takes 8 mins to the top and it can be a bit scary if you are afraid of heights. You also have a certain amount of time to spend at the top (1 1/2 -2 hrs if I can remember correctly).

If you want to leave before your designated time you have to go to customer service (at the top) and see if you can get your time changed. That’s what we ended up doing.

IMG_0036IMG_0083IMG_0187

The views from the top are truly spectacular!

We also did the Tunnel Mountain  drive. This is a about a 5 mi scenic drive and starts at the intersection of Banff Ave & Buffalo St.

On this drive you will see, Surprise Corner (a view of the Banff Springs Hotel), Hoodoos (unique rock formations-we never found them), Bow River, Mt Rundle and the Bow Valley. You will end up back on Banff Ave.

enhance

We then drove the Lake Minnewanka Loop. This is a 15 mi scenic drive. It’s about 10 miles from Banff. Your first stop along the drive will be Cascade Ponds. There’s a short .3 mile trail that leads to Cascade Falls.

IMG_0275

You will then see Johnson Lake , Two Jack LakeLake Minnewanka and Upper and Lower Bankhead. There are scenic boat tours, kayaking and canoeing available on Lake Minnewanka. There is also a cafe here.

enhanceIMG_0311IMG_0342

The loop ends back in Banff. I would allow approximately 1.5+ hrs for drive w/stops.

Tip: Click here for 21 things to do in Banff

We then headed to Eddie Burger for a delicious burger and our first ever poutine fries. They were delicious!

Read reviews here

After we ate, we headed to our next hotel, Castle Mountain Chalets.

Read reviews here

We stayed here 4 nights. The chalets were about 30 mins from Banff, 20 mins to Lake Louise, 10 mins to Johnston Canyon, 40 mins to Lake Moraine and about 5 mins from the Bow Valley Parkway.

enhance

We absolutely loved this place. It was so quiet! You have an amazing view of Castle Mountain. The property has a small general store that sells all kinds of snacks.

They also offer bike rentals, maps, discount Lake Louise ski lift passes and Lake Louise Gondola discounts. They also sell gas.

The general store hours vary seasonally so check their website for store hours.

The Bow River was a short walk from our cabin. There’s also a small parking lot at the bridge. We drove down a couple of nights to watch the sunset.

We also saw a bear in this area. The closest restaurants are at Baker Creek and Johnston Canyon Resort.

enhance

enhance

The next day we headed to Sunshine Village to do some hiking.

This place is known for their ski resort and their spectacular hiking trails. It was approx. 30 mins from our cabin.

We arrived and it felt like a ghost town…hardly anyone was here! It was wonderful!

We purchased the gondola and chairlift tour. The cost was $64 pp.

You ride the gondola for approx 25 mins and then get on the ski lift for about 10 mins. It was a little scary but the views were amazing! I HIGHLY recommend hiking here!

IMG_0505

Picture taken from the standish viewing deck. You can see all 3 lakes from this viewpoint.

IMG_0569

There are several trails here but we only hiked to Rock Isle Lake (seen in the pic above). It’s about a mile one way and considered to be a moderate hike. There are trail maps available when you buy your tickets.

We were here in July and the flowers were blooming all over!! Also, this is bear habitat so wear bells or make noise..becoming bear poop is not how you want your vacation to end! 😉

We ended up eating lunch at one of the cafes. Not many choices available…we ate a pre made sandwich and chips.

We then headed to the Bow Valley Parkway. This is a 32 mile scenic drive and our cabin was only a mile from this parkway. This drive offers one of the best wildlife opportunities in Banff …however, we never saw anything.

enhance

There are several stops along this drive as well as hiking trails. However, there was only a few places worth stopping in my opinion and my favorite was the beautiful Johnston Canyon.

There are 3 hikes at this location…. The upper and lower falls and the ink pots. This place has bathrooms as well as food. If you are pressed for time, I would pick this one stop over the others.

Tip: Read here for a complete guide of this area and recent closures

Unfortunately, we only did the lower falls because it started raining and it was SO crowded on the trail that you could barely move! Get here early if you can.

enhance

enhance

We only did 4 stops on this drive.

One of the other stops we did was Morant’s Curve.

There were no signs for this stop.

It has panoramic views of the river, rail line and the Canadian Alps. A lot of people will stop here in hopes to capture a train on the tracks. Below are some shots I took at this location.

enhanceenhance

Another stop was at Hillsdale Meadows: A short hike to an open meadow. There were 2 red chairs sitting against the aspen trees that made for a pretty shot.

The other stop we did was Backswamp. This place is a marshy wetland where the Bow River once flowed. You can sometimes spot big horn sheep here as well as Ospreys and Blue Heron.

enhance

After we finished this drive, we headed back into Banff to find something to eat.

The food is expensive and the service was sub par at most of the restaurants we went to.

After eating, we walked/drove around Banff. Don’t miss taking your picture at the Banff sign.

IMG_0368

We then did the Vermillion Lake Drive. The drive is less than 5 mins from the Banff sign.

It’s a really peaceful place and we loved it here. It’s only a 2.5 mi drive and there is a walking trail you can do at the very end.

This is also a good place to spot wildlife. We saw a black bear while we were here.

It’s also a great place to watch a sunset or have a picnic. The views of Mt Rundle are awesome!

Don’t miss this short but scenic drive!

IMG_0369

enhanceenhance

We then headed to one of the must do places….Lake Louise !! This place is not to be missed! The lake usually thaws sometime in June..we were there in July.

You can hike along the shoreline or hike up to the famous Lake Agnes Tea House. We did this hike on a different day and I’ll write about it later in this post.

Click here for the 8 best hikes in this area

Lake Louise is a year-round destination outside of the shoulder months of October/May, and even then, certain points in those months can be great. In the winter, you can enjoy sleigh rides, ice skating, ice climbing, skiing, and snowshoeing.

The best tip that I can give you is to get here either very early (6-8 am) or much later in the evening (7-8 pm) to avoid the crowds. They do have an overflow parking lot where you park and are shuttled by bus to the lake. We parked at the lake both times we went.

Update: Paid parking will be in effect for Lake Louise from 7am-7pm between mid-May and mid-October. This is in addition to your Parks Canada Pass needed for all of Banff National Park.  Look for pay stations when you arrive at Lake Louise; the fee is $12.25 per vehicle per day. You’ll need to input your license plate number into the pay kiosk. You cannot park overnight at Lake Louise lake shore.

Also new is the need for a reservation if you intend to ride the summer shuttle to Lake Louise from the Lake Louise Park and Ride. Reservations open on May 4th, 2022 at 8am MST, on the Parks Canada website. This option guarantees you will get to Lake Louise, while the paid parking is on a first-come/first-serve basis

Once at the Lake Louise Lakeshore, you can connect between Lake Louise and Moraine Lake on a first-come, first-serve basis via the Lake Connector shuttle (free with shuttle reservation); they run every 15 minutes.

There will also be a portion of seats released on a rolling basis for the Lake Louise shuttle, 48 hours prior to departure day at 8 am MST. Walk up seat sales are possible if there is space on the shuttle. You’ll be able to book your seat reservation on the Parks Canada website.

After arriving to the lake, we rented a canoe at the boathouse. The cost was $105 for an hour. The beautiful, historic Fairmont hotel is located right on the shoreline. The cost to stay here in July is around $700-900 a night. (Update: The cost is now $135 for an hr and $125 for 30 mins)

We purchased our lunch at the 24 hr deli inside the hotel and it was very good. There is also a gondola ride you can do for around $30 pp. It’s a 14 min one way ride.

enhanceenhanceenhance

enhance

The next day we decided to spend at the beautiful And not to be missed, Lake Moraine! This lake is even more spectacular than Lake Louise!

Again, get here early or late evening to avoid the crowds. There isn’t an overflow parking lot for this lake unlike Lake Louise and parking can fill up quickly! I wouldn’t get here later than 8-8:30 am.

Update: There is now a shuttle for Lake Moraine that leaves from the Lake Louise overflow parking lot & the Banff train station.

Update for 2023: In 2023, Moraine Lake Parking will be officially closed to personal vehicles. This new policy will help alleviate some safety, preservation, and congestion concerns around the Moraine Lake site. Read more here and book your shuttle ticket here.

Visitors can now visit the lake through the public shuttle bus system known as Park & Ride. It is also possible to access the lake via bike, public transport from Banff, or a private tour company. Disabled visitors can still access the Moraine Lake parking lot.

You can rent canoes here and the cost is around $100 an hr (not per person) unless you stay at the Moraine Lake Lodge, then it’s free. There are plenty of things to do here to keep you busy for several hours. (Update: The cost is now $130 an hr)

There are several hiking trails as well as horseback riding and a gondola you can ride.

For more activities in this area click here

Be mindful, if you are planning a visit here, the lake does not begin to thaw until June and you can’t access the lake during the months of Nov – April due to high avalanche risk. Also, during the times of high grizzly bear activity, there are many hiking trail restrictions.

After arriving, we did a small portion of the shoreline hike and the Rockpile hike.

The views were stunning!! Don’t miss the “20 dollar” view as it’s called from atop of the Rockpile. They call it this because it’s actually on the back of their older 20 dollar bills. It’s a very short hike and so worth it!

enhanceenhance

The Rockpile Trail (above)

enhance

That “20 Dollar” View!! I personally think it’s a million dollar view! enhance

The color of the water changes depending on where you are viewing it from!

After Lake Moraine, we headed back to Lake Louise. We actually visited both lakes twice. We visited in the evening and during the day and let me just say, during the day it’s a mad house! Since Lake Louise has overflow parking, you may want to go to Lake Moraine first.

After reading about the hike to the Lake Agnes Tea House during my trip planning,  I really wanted to add this hike to our list. It’s a 4.5 mi round trip hike. I thought I was in half way decent shape until I took on this hike! It was brutal…to me anyways.

I mean, there was an 80 yr old man that passed me but whatever! It was uphill and I could hardly breathe due to the elevation gain! Be prepared and take plenty of water and snacks.

There is food at the tea house so maybe that will motivate you enough to keep going! They also serve more than a 100 different types of loose leaf teas!

Read reviews for the hike here

Sadly, it was so busy when we arrived, we decided to pass on eating lunch here… I did hear the food was really good.

On this hike you will see some spectacular views and even though, at times, I felt I needed to be airlifted out of there, in the end, I was SO happy that I endured the pain and blisters for the views I saw! Make sure you have very comfortable shoes for this hike!

You will not only see Lake Agnes and the tea house you will also see Mirror Lake & Beehive. The hike continues past the first tea house. If you continue, you will come to a 2nd tea house which was built in 1924.

The first one was built in 1901 but was replaced in the early 80’s. However, there were some tables, chairs and windows from the original tea house used in the building of the newer tea house in order to preserve the authenticity and rustic charm.

This trail also leads to the Plain of Six Glaciers and the Plain of Six Glaciers Tea House.

We turned around after arriving to the first tea house.

enhance

Views of Lake Louise from the trail…if you look closely, you can see canoes!

enhance

Mirror Lake and Beehive

Read here about the hike to Big Beehive

enhance

Small waterfall on the trail

enhance

Beautiful Lake Agnes!

enhance

The very crowded tea house

enhance

We hiked a short distance around Lake Agnes...

enhance

The flowers were in full bloom!!

We then headed back down…much better!

This is actually the day we canoed Lake Louise and had lunch at the 24 hr deli inside the Fairmont hotel.

On day 4, we planned to spend all day at YOHO National Park.

It was a 45 min drive from our hotel.

Yoho is located in Field, BC. I would highly recommend you add this park to your list of must dos!

There are several things to see/do at this park.

Your first stop will be the Spiral Tunnels. The Spiral tunnels are railways that have been carved through mountains. If you time it right you will get to see a train coming through the tunnel.

enhance

There is a second spot where you can view the Upper Spiral Tunnels in Cathedral Mountain. Its a pull off located 2.3 kms along the Yoho Valley Rd.

The tunnels are now so obscured by trees you can barely see it. I had to zoom all the way out with my camera to find it.

The next stop will be Takakkaw Falls. It’s one of the highest waterfalls in Canada.enhanceenhance

You will then come to the Natural Bridge. The bridge is a limestone rock formation that has formed over the Kicking Horse River.enhance

enhance

Next will be the breathtaking Emerald Lake!

You can hike and canoe here. There is also food available as well as the beautiful Emerald Lake Lodge.

We hiked a short distance around the shoreline trail.

enhanceenhance

Read more here on things go do at Emerald Lake

After leaving the lake, we headed to the very small town of Field.

It was really cool and I highly recommend you make a stop here.

There are a few restaurants in Field and we ended up eating at Siding Cafe. We all ordered the chicken “burger”. It was truly one of the best I’ve ever had…my daughter and hubby agreed!

Read reviews hereenhanceenhanceenhanceenhance

After spending some time here walking around and admiring this quaint little town and all of the beautiful flowers that were blooming, we headed to the next stop which was Wapta Falls.

The falls are accessed by driving a 1.25 mile gravel road off the Trans-Canada Hwy. The trail is approx 3 miles roundtrip and is a fairly easy trail. I would allow approx 1.5-2 hrs for this stop.

I would recommend you wear bug spray as the trail is in a very forested area. I would also make noise in case of bears. The trail leads to the largest waterfall on Kicking River. It drops 30 meters and is 150 meters wide.

There’s a view looking at the river and the top of the falls however, if you go a bit further down (which is a bit harrowing), you can get to the viewpoints at the lower part of the falls for a different view.

enhanceenhanceenhance

These were the only stops we did in the park. There is also  Lake O’Hara.  However, access during the summer months are limited in order to protect the delicate environment. It can only be accessed by foot along a 7 mi gravel road or by reserving a seat on the Parks Canada bus.

These tickets start selling online April 20, 2018 at 8 am and are $14.70 r/t for adults and $7.30 for youth 6-16 yrs of age. Children 5 and under are free. Please keep in mind, these tickets book up for the entire season almost instantly! You can call Parks Canada at 1-877-RESERVE and make reservations over the phone as well.

There is also the Burgess Shale tour. This is the site of fossilized remains of over a hundred different marine animal species. This can only be accessed by a guided tour. You need to make advanced reservations as they limit the groups to 12-15 people.

We then headed back to Banff. We spotted an old bridge on the way back so we made a quick stop to check it out and take some pics.enhanceenhance

We spent the rest of our time in Banff walking around town shopping, eating and of course, taking lots of pictures! 😉

My hubby had read about these desserts called beaver tails so we just had to try them out! They were messy but so delicious!

enhance

Here are a few shots of Banff. We loved it here!

enhanceenhanceenhanceenhanceenhanceenhance

Me standing in front of the Bow River.  You can canoe here as well.

Other activities in Banff includeCave & Basin National Historic siteBanff Hot Springs, tour the historic Banff Springs Hotel that opened in 1888, do a boat tour on the Bow River, hike the Hoodoos Trail, do a hop on/off bus tour, visit the Cascade Gardens or canoe the Bow River for $40 for an hr. Rent a bike, visit the Banff Park Museum, do a Blue Bus Tour, do a river float on Bow River, take a sleigh ride, book a cowboy cookout or take a carriage ride. Visit the nearby town of Canmore.

There is also another national park only 30 mins from Banff or 10 mins from our cabin. It’s called Kootenay. I wished we had had time to visit…from what I read, there seems to be a lot to do and see there.

Tip: If you don’t want to stay in the town of Banff, another option is Canmore. It’s only 20 mins from Banff

Well, I hope you found this post to be helpful and informative and something you can refer to when planning your own trip to Banff or Yoho.  I’ll be working on my next post for the Icefield’s Parkway and Jasper and get that posted as soon as I can.

UPDATE: Read my Icefield’s Pkwy & Jasper blog here & Click here to see links to all of my blog posts

Thanks for reading!! 🙂